Article Contents:
- Philosophy of Quick Transformation
- Anatomy of Door Decor
- Stylistic Codes and Their Interpretation
- Installation Technology: From Concept to Implementation
- Surface Preparation
- Composition Design
- Element Preparation
- Adhesion process
- Angles and Joints
- Final finishing
- Frame Panels: Genre Classic
- Rail Compositions: Graphics and Minimalism
- Oblique Frame: A Frame Creating a Portal
- Color, Patina, Texture: The Art of Final Finishing
- Practical Tips and Professional Secrets
- Common Mistakes and How to Avoid Them
- Jamb and Sill: Completing the Look
- Specifics of Different Types of Doors
- Aligning Door Decor with Interior Design
- Budget Considerations and Smart Savings
- Questions and Answers
- Inspiration and References
- Conclusion

Have you ever noticed how your home's doors look? Not just noticed — but truly seen? Most people pass by these vertical surfaces dozens of times a day, unaware of how strongly they influence the perception of the entire space. Worn, faded, dull doors can ruin any, even the most sophisticated interior. Conversely, well-designed doors become architectural accents that set the tone for the entire room.
Replacing doors is an expensive and cumbersome undertaking. Demolishing old structures, fitting new ones, inevitable damage to jambs, dust, noise, the need to clear the room. And if you’re talking about several doors in a house or apartment, the budget quickly exceeds hundreds of thousands of rubles. But there’s another way — quick, elegant, economically sensible.
Decorating doors with applied elements is not cosmetic camouflage, but a full architectural transformation.Decorative InsertsRails, mullions, moldings can turn a budget-friendly smooth panel into a piece of joinery art, create an illusion of expensive louvered construction, add depth, rhythm, stylistic definition. And all this in just a few hours of work — without dust, dirt, or major investments.
In this article, we don’t just list types of decorative elements — we show the logic of their application, reveal the secrets of professional approaches, teach you to think like a designer and work like a craftsman. You’ll learn how to turn ordinary doors into distinctive interior elements that will impress guests and delight you every day.


Philosophy of Quick Transformation
Why applied decor works? Because human perception responds not to material reality, but to visual signals. The eye does not distinguish whether it’s a single panel or a skillfully applied frame — it reads the rhythm of lines, play of shadows, composition of forms. Properly executed door decor creates a convincing illusion of expensive construction.
Speed of transformation is the key advantage of the method. Traditional manufacturing of louvered doors requires a week of carpenter’s work, complex equipment, high skill level. Applied decor is installed in a few hours by one person with minimal tools. In the morning, you have a regular door; in the evening — an architectural element.
Reversibility of the solution removes the psychological barrier to experimentation. If the result is unsatisfactory or you want to change the style — applied elements can be easily dismantled without damaging the base panel. This fundamentally differs from irreversible methods such as milling or carving.
Economic logic is obvious. A set of qualitysolid wood overlayscosts 5–10 times less than a new door of comparable visual quality. Meanwhile, the base panel can be the simplest — laminated MDF or particleboard. Decor hides the budget nature of the base, creating an impression of solidity.
Variability of stylistic solutions is practically limitless. By changing the configuration, quantity, and profile of applied elements, you can create classical, modern, ethnic, eclectic compositions. The same base panel becomes completely different doors depending on the decor.
The technological accessibility of the method makes it implementable for people without specialized training. No lathes, milling machines, or specialized knowledge are required. Basic principles of composition, careful measurements, and patience during work are sufficient.
The psychological effect of updated doors exceeds expectations. A person entering the room subconsciously reads status markers. Well-designed doors signal attention to detail, taste, and wealth. This creates a positive first impression of the entire interior.


Anatomy of Door Decoration
Before beginning transformation, one must understand the language of elements — what details exist, what they do, how they function in composition. This is an alphabet from which expressive phrases are built.
Plates are the basic building blocks of framed composition. They are profiled strips of various cross-sections, creating volumetric frames on the door's surface. Standard width: 30–80 mm, thickness: 8–20 mm. Profile can be simple rectangular, beveled at an angle, decorative with rounded edges and bosses. Material — natural oak, ash, beech, or MDF with finish.
The function of plates — creating framed panels that imitate lath construction. They divide the door’s surface into zones, create rhythm of verticals and horizontals, add depth through play of light and shadow. Properly placed plates can visually alter the door’s proportions — elongate or widen it.
Ribs — thinner and more minimalist elements, creating graphic lines. Thickness: 5–15 mm, width: 10–40 mm.wooden planks on the wallUsed for doors when a modern minimalist aesthetic is desired. Ribs can be arranged vertically, horizontally, diagonally, creating various geometric patterns.
The function of ribs — creating rhythmic structure without the bulkiness of traditional plates. They work on graphics, not volume. Especially effective in modern interiors, where minimalism and clear lines are valued. Ribs can be contrasting in color to the main panel or tonally matched.
Sill plates — framing elements that decorate the door opening from the room side. Standard width: 60–100 mm, thickness: 10–20 mm.Wooden casingMay have a simple rectangular profile or complex decorative cross-section with relief.
The function of sill plates — creating an architectural frame around the door, hiding the junction between the frame and wall, visually emphasizing the door opening. Properly selected sill plates link the door with the interior, echoing the profiles of baseboards, cornices, and other architectural elements of the room.
Moldings — profiled strips with relief cross-section, creating decorative accents. Width varies from 20 to 150 mm; profile may include grooves, beads, rounded edges, bosses.Wooden moldingsAdd classical elegance.
The function of moldings — creating stylistic accents, enhancing the expressiveness of framed compositions, adding historical connotations. Moldings are especially important in classical interiors, where detail and relief define status.
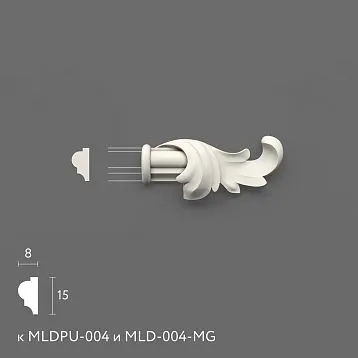
Rosettes — round or oval decorative elements with relief ornament. Diameter: 50–200 mm, thickness: 10–30 mm.decorative rose outletsWith carved patterns — floral, geometric, classical.
The function of rosettes — accentuating compositional nodes, decorating junctions of elements, creating compositional centers. A rosette at the center of the door panel or at junctions of plates draws attention and adds elegance.
Fillers — additional strips that extend the door frame for thick walls. Width depends on wall thickness, usually 50–200 mm. Although fillers serve a utilitarian function, they can be transformed into decorative elements by selecting profiled variants or combining with plates.
The function of fillers in the context of decoration — creating depth of the door opening, an additional plane for placing decorative elements, enhancing the architectural character of the door.
Our factory also produces:


Stylistic Codes and Their Interpretation
Each interior style has its own visual code — a set of characteristic forms, proportions, rhythms. Door decoration must speak the same language as the surrounding space. Let’s consider key stylistic directions.
Classicism requires symmetry, clear proportions, academic correctness. The door is divided into three vertical zones by plates — the central one is wider than the side ones. In each zone, rectangular panels with side ratios close to the golden section are formed. Plate profile — moderately relief, with smooth transitions. Color — noble wood tones or white enamel with patina.
Empire intensifies the classical base with pomp and monumentality. Plates are wide, profile more pronounced. Rosettes with imperial symbolism — wreaths, torches, swords are mandatory. Gilding or bronze finish on protruding elements. Composition is deliberately ceremonial, symmetrical, with emphasized verticality.
Baroque explodes academic restraint with opulence of forms. Curved plates form complex cartouches. Numerous small details — scrolls, volutes, rocaille. Rosettes with lush floral ornament. Deep relief profiling creates dramatic play of light and shadow. Gilding, patina, multi-layer color effects.
Provence and country styles lean toward rustic simplicity with romantic touches. Plates form rectangular panels, but without the strict symmetry of classicism. Profile is simple, without excess. Characteristic technique of aging — wear on protruding areas, patina in recesses. Colors are pastel — white, cream, blue, lavender. May include painting — floral motifs, botanical ornament.
Scandinavian style is minimalist and functional. Ribs instead of bulky plates. Composition is simple — vertical or horizontal lines, division into two or three zones. Profile is flat or with minimal bevel. Colors are light — white, light gray, natural wood without staining. Emphasis on wood texture, not relief.
Minimalism reduces decoration to absolute minimum. Thin ribs create concise geometry — rectangles, squares, parallel lines. No rosettes, relief, ornament. Color monochromatic — white, gray, black. Ideal — impression that decoration is not decoration, but part of the door’s structure.
Loft and industrial styles use deliberately rough forms.Wooden planksMay alternate with metal strips. Asymmetric compositions, uneven intervals, intentional carelessness. Colors are dark or contrasting. Patina, rust, wear effects are artificially created to imitate industrial objects.
Art Deco combines geometry with luxury. Panels form strict rectangles, but with accentuated corners — beveled, rounded, adorned with rosettes. Symmetry is mandatory. Profile is clear and graphic. Characteristic are contrasting combinations — dark wood with light inserts, glossy and matte surfaces.
Modern eclecticism allows mixing styles, but requires compositional logic. You can combine classic panels with modern rails if a unifying idea is found — color, proportions, rhythm. Eclecticism is not chaos, but a thoughtful dialogue between different stylistic languages.
Get Consultation
Installation technology: from concept to realization
Any creative idea remains a dream without proper implementation. Door decoration installation technology does not require professional skills, but demands methodicalness, precision, and attention to detail.
Surface preparation
The door must be perfectly clean, degreased, and flat. Remove the panel from hinges and lay it horizontally on supports — chairs, sawhorses, tables. Inspect the surface for defects — scratches, dents, chips.
Sanding levels microscopic irregularities and creates a matte surface for better adhesive bonding. Use an orbital sander with P120-P180 grit for primary processing, P220-P240 for finishing. Use circular motions without pressure to avoid removing the finish down to the base. After sanding, thoroughly remove dust — with a vacuum cleaner, then with a damp cloth.
Degreasing removes silicone, grease, and polish residues. Wipe the surface with white spirit or a specialized degreaser. Allow to dry completely — 15-20 minutes. Do not touch the surface with hands after degreasing.
Primer improves adhesive bonding to the base. For laminated surfaces, use an adhesive primer; for wood, use a universal acrylic primer. Apply in a thin layer with a roller or brush. Drying time according to manufacturer’s instructions — usually 2-4 hours.
Composition design
Before cutting and gluing, create an accurate drawing of the future composition. Measure the door — height, width. Determine the size and placement of framed panels. Classic scheme — three vertical panels (width ratio 1:1.5:1) and two horizontal zones (upper smaller than lower).
Margins from the edge of the panel — 60-100 mm top and bottom, 50-80 mm sides. Distance between panels — 40-70 mm. These gaps create 'air' in the composition, preventing it from appearing cramped.
Draw the layout to scale on paper or create it in a graphic editor. Check proportions — they must be harmonious, without arbitrary sizes. Print the drawing and keep it in view during work.
Transfer the layout onto the door with a pencil. Use a long metal ruler and a square for precise lines. Check parallelism of opposite frame sides and perpendicularity of angles. Even minor deviations will be noticeable after installation.
Element preparation
Panels, rails, and trim are usually supplied in standard lengths of 2-3 meters. You need to cut them to size according to the drawing. For straight joints, use a miter saw with precise 90° angle setting. For angled joints (classic frames), cut at 45°.
Cutting accuracy is critical — even a 0.5 mm deviation will create a gap at the joint. Use quality equipment or joinery workshop services. After cutting, dry-check the fit of elements — they should align without gaps.
Sanding ends with fine abrasive (P240-P320) removes burrs and creates a perfectly smooth edge. Remove a 0.5 mm chamfer from sharp edges to prevent chipping.
Pre-finishing elements before installation is more efficient than after. If painting is planned — prime and paint the parts. If staining — treat with stain and varnish. Doing this before gluing is easier, as you don’t need to worry about materials getting on the main panel.
Adhesive application process
Adhesive is selected based on materials. For wood to wood — carpentry PVA or polyurethane glue. For wood to laminate — liquid nails or construction adhesive. Apply adhesive in a thin, even layer to the back of the panel, using a notched trowel for large elements or a brush for small ones.
Place the element precisely according to the layout, press firmly along the entire length. The first few seconds are critical — you can adjust the position. Then the adhesive begins to set. Check that the element lies exactly on the lines, is parallel to the edges, and joints align without gaps.
Fixation during adhesive polymerization is done with painter’s tape, weights, and clamps. Painter’s tape is applied perpendicular to the panel every 20-30 cm. Weights (sandbags, bricks, books) are distributed evenly. Clamps are used for long straight elements.
Drying time — according to adhesive instructions, usually 24 hours until full strength. Do not move the door or remove fixation prematurely. Immediately wipe away any excess adhesive with a damp cloth; dried adhesive must be cut with a knife and sanded.
Angles and joints
Professional appearance of decoration is determined by the quality of joints. At frame corners, elements connect at 45° — classic 'box' joint. Edges must be perfectly mitered; otherwise, a gap will form.
If a gap still appears — fill it with wood-colored acrylic sealant, smooth with a wet finger. After drying, you can stain or paint it to match.
Straight joints (e.g., on long horizontal elements) are butt-jointed with 90° mitering. It is important that the profiles of elements match exactly in height and pattern. The joint should be invisible — as if it were a single element.
Rosettes and decorative panels are mounted over main elements at junction points — at joints, at panel centers. They mask joint imperfections and create accents.
Final finishing
After full adhesive polymerization, remove fixing elements. Critically inspect the work. Minor defects — gaps, chips, adhesive residue — remove with wood putty, then sand.
If elements were installed uncolored — now is the time for final finishing. Protect the main panel with painter’s tape and film. Apply stain, paint, or varnish according to the chosen concept. Modern water-based compositions dry quickly and have no odor.
Painting can be monochromatic or with effects — patina, brushing, multi-color techniques. Patina creates an aged effect — a base color is covered with contrasting patina, which wears away, remaining in recesses.
Door installation in place is performed after the coating is fully dry. Check that hardware is installed correctly, the door does not hit the frame, and locks without effort.
Framed panels: genre classic
Frame panels are the most popular and universal form of door decoration. They imitate the structure of a traditional louvered door, where frames surround recessed or protruding panels.
Three-panel vertical composition — a classic canon. The door is divided into three vertical zones. The central panel is wider than the side panels — approximately 1.3–1.5 times. Each panel is further divided horizontally by overlays into two parts — the upper part is about 40%, the lower part 60% of the height.
This composition is balanced, proportional, and looks good on doors of any height. It suits classical, traditional, and transitional interiors. The profile of the overlays can vary from simple rectangular to complex shaped, depending on the desired level of detail.
Two-panel horizontal composition emphasizes the width of the door. The horizontal overlay divides the door panel roughly into thirds — the upper panel is smaller, the lower one is larger. Within each panel, additional divisions can be created using vertical or horizontal elements.
This type of composition is good for wide doors and double-door constructions. It creates a sense of solidity and monumentality. Suitable for entrance doors, offices, libraries — spaces with a formal character.
Multi-panel, finely divided composition creates an impression of complexity and richness. Numerous small rectangular panels form a regular grid. This approach is characteristic of English, colonial, and traditional American styles.
It is important to maintain a single module — all panels must be proportionally related to each other. Random sizes will create a sense of chaos. Usually, the ratio of 1:1.5 or 1:1.6 between panel width and height is used.
Asymmetric compositions break classical symmetry to create a modern, dynamic image. Panels of different sizes are arranged asymmetrically, but the overall composition remains balanced. This requires a developed sense of proportion and compositional thinking.
Asymmetry works well in modern eclectic interiors where individuality is valued. However, it is risky — easily leads to visual chaos. It is recommended to first create several sketches and evaluate them from the side.
Inserts of contrasting material within the frames add textural variety. Into the rectangle formed by the overlays, you can insert fabric, wallpaper, mirror, colored glass, metal mesh. This creates layering and texture play.
Fabric inserts add softness and coziness. Suitable for bedrooms, boudoirs. Mirror inserts visually expand space, making the door lighter. Good for small rooms, closets. Colored glass creates a vintage stained-glass effect.
Louvered compositions: graphic and minimalist
If frame panels speak the language of volume and tradition, then louvered compositions — the language of graphics and modernity.Wooden boards in interiorThey create clear lines, rhythmic structures, minimalist aesthetics.
Vertical rhythm from parallel laths — the simplest and most effective solution. Laths of equal width (15–30 mm) are arranged vertically with equal intervals (20–50 mm). This creates a vertical striped effect, visually elongating the door.
The number of laths depends on the door width and chosen spacing. For a standard 800 mm wide door with a 40 mm spacing, you will get about 10 laths. Accuracy of placement is important — intervals must be absolutely equal, otherwise asymmetry will be noticeable.
Horizontal rhythm creates the opposite effect — it widens the door, making it visually lower. Suitable for tall, narrow doors that need to be balanced. Horizontal laths can be arranged across the entire height or only in the lower or upper part.
Combining vertical and horizontal laths forms grid-like structures. The simplest option — a checkerboard pattern of vertical and horizontal elements. More complex — asymmetrical intersections, creating a dynamic composition.
When laths intersect, it is important to decide which elements lie over others. Usually, vertical laths run continuously, while horizontal ones are interrupted at intersections. This creates a visual priority for vertical elements.
Diagonal laths introduce dynamism and directional movement. Diagonals can be parallel (all under one angle) or intersecting (rhomboid pattern). The angle of inclination affects the character of the composition — 30° creates smooth movement, 45° — active.
Diagonals are more complex to execute — each lath requires beveling at an angle on both sides. Accuracy of angles and lengths is crucial, otherwise the pattern will blur. It is recommended to first lay out the composition dry, checking the alignment of all elements.
Variable rhythm with changing intervals creates a more complex visual structure. Intervals between laths are not equal, but follow a certain pattern — gradation from narrow to wide, alternation of wide and narrow, grouping in sets of several laths.
Such a composition requires careful planning — random intervals will create an impression of error. A clear logic of distribution is needed, which is visually readable. Variable rhythm is good for large surfaces, where monotony of identical intervals may be tiring.
Combination of laths of different widths adds tectonic complexity. Thick laths 40–50 mm alternate with thin ones 10–15 mm. This creates an impression of hierarchy — main and secondary elements, load-bearing and filling.
Contrasting coloring of laths relative to the door panel enhances the graphic effect. Black laths on a white background, white on gray, natural wood on painted surfaces — contrast makes the rhythmic structure maximally readable.
Mullion: frame creating a portal
Mullions do not simply cover the junction between the frame and the wall — they create an architectural frame around the door, transforming the door opening into a portal, a compositional element of the interior.Wooden casings create a frame around the opening, visually highlighting it from the wall plane. A classic casing has a profiled section that corresponds to the profiles of baseboards and moldings.They determine how expressively the door is present in space.
Simple rectangular mullion 60–70 mm wide — minimal necessary framing. Profile is flat or with a slight bevel. Color is usually matching the door panel or contrasting with the wall. Such a mullion does not draw attention but neatly finishes the door opening.
Suitable for modern minimalist interiors where decorative elements are minimized. Also universal for modest budgets — simple mullions are inexpensive and easy to install.
Decorative casing with a relief profile adds classical elegance. Width 70-100 mm, cross-section includes rounded edges, bosses, and chamfers. The profile can be symmetrical or asymmetrical — with more complex detailing on the outer side.
Decorative casings are suitable for classical, traditional, and transitional interiors. They create a sense of quality and attention to detail. It is important that the casing profile matches the profiles ofbaseboardscornices in the room.
A wide casing 120-150 mm transforms the door opening into a significant architectural element. Such casing is typical for grand rooms, offices, and libraries. A wide casing can be smooth in a modern style or richly profiled in a classical style.
Wide framing visually enlarges the door, making the opening monumental. However, it requires sufficient wall space — in narrow jambs, wide casings will look bulky.
Casing with capitals and pedestals creates a columnar structure. Vertical casings (stiles) are topped with capitals — expanded carved elements. Pedestals — square base blocks — may be installed below. The horizontal casing (frieze) above the door is often wider and more elaborately profiled.
Such casing turns the door into a kind of classical portico with columns. It is characteristic of palace, Empire, and neoclassical interiors. Requires high ceilings and spacious rooms.
Asymmetric casing — a modern technique where casings on different sides of the door have different widths or profiles. For example, a wide 100 mm casing on the hinge side, a narrow 60 mm casing on the lock side. Or even a casing on only one side.
Asymmetry creates dynamism and originality. But it must be intentional, subordinate to the overall compositional idea of the interior. Random asymmetry looks like an error.
Combined casing combines different materials — wood with metal, wood with stone. The main casing is wooden, but supplemented with metal inlays and stone cladding of the base part. Such solutions are typical for eclectic and loft interiors.
Color solution of the casing critically affects perception. Casing in wall color makes the door visually light, blending into the space. Casing in door color creates a unified portal. Contrasting casings accentuate the door opening, making it a striking element.
Color, patina, texture: the art of final finishing
Decorative elements are mounted — but this is only half the job. Final finishing determines whether inlays and rails will look like expensive carpentry or cheap applique.
Coloring in door color creates visual unity, the impression of a single structure. Mounted decor blends with the base, relief is perceived only through light and shadow. Such a solution is universal and suitable for any style.
Color harmony is critical. If the door is white, the inlays must also be white — but not just any white, but the same shade of white (warm, cool, milk). Even the slightest tone difference will be noticeable. Use paint from the same manufacturer, preferably from the same batch.
Contrasting coloring turns decor into a graphic element. Dark inlays on a light door, light on a dark door. Black-and-white, gray-and-white, natural wood on a painted background — contrast makes the relief maximally readable.
Contrasting decor requires flawless execution — any uneven joint, gap, or misalignment will be noticeable. But with quality execution, the effect is dramatic and expressive.
Staining with stain emphasizes wood texture, creating a warm, natural aesthetic. Stains come in water-based, alcohol-based, and oil-based — each gives its own shade and depth of penetration. Water-based stains raise the nap, requiring intermediate sanding. Alcohol-based stains dry quickly, are difficult to apply evenly. Oil-based stains give a deep, saturated tone.
After staining, protective coating — varnish or oil — is mandatory. Varnish creates a film protecting against moisture and abrasion. Oil penetrates the wood, preserving its tactile quality. The choice depends on usage requirements and desired appearance.
Patination creates an effect of noble antiquity, emphasizing relief. A base coat of paint is covered with contrasting patina (usually dark), which then partially wears away, remaining in recesses and edges. This creates the impression of natural darkening over time.
Classic scheme — light base (white, cream) with dark patina (brown, gray). Reverse option — dark base with light patina — creates an effect of dusty residue. Patination requires patience and artistic sense.
Brushing — mechanical emphasis on wood texture. Soft layers between annual rings are brushed with a metal brush, creating a pronounced relief. Then the surface is stained in two colors — recesses darker, protrusions lighter.
Brushing transforms ordinary pine into wood with characteristic dark texture. Hardwoods — oak, beech — also brush well. This is a labor-intensive process, but the result is a unique tactile surface.
Gilding and silvering add luxury and drama. Gold or silver paint, paste, or patina is applied to raised parts of the relief. Especially effective on Baroque, Empire, and palace compositions.
Moderation is important — full gilding looks vulgar. Gold should only emphasize relief, accentuate details, not cover the entire surface. The "dry brush" technique — gold paint applied almost dry only to raised parts — gives an elegant effect.
Multi-layer techniques combine several methods. For example: base color + patination + gilding of raised parts. Or: staining + brushing + oil finish. Multi-layering creates depth, complexity, and visual richness.
But it requires experience and sense of proportion. It is easy to overdo decor, turning it into tastelessness. Each layer must be justified and contribute to the overall image.
Practical tricks and professional secrets
After years of work, masters accumulate techniques that simplify the process and improve results. Here are some of them.
Measure seven times, cut once. A banal saying, but critical in door decoration. An error of 2-3 mm makes the joint noticeable. Double-check every dimension, use precise tools, account for saw blade cut thickness.
Make test joints. Before cutting all elements, cut two test pieces and join them at the required angle. Check the joint quality — is there any gap, does the profile match? If something is wrong, adjust the saw settings.
Number the elements. After cutting all parts, mark them with chalk or pencil — which element goes where. This prevents confusion during assembly, especially if elements are similar but differ slightly in length.
Use temporary guides. When gluing long straight elements, attach painter’s tape parallel to the marking line as a temporary guide. It will prevent the panel from shifting when pressing down.
Don’t skimp on glue. It’s better to apply slightly more and wipe off excess, than insufficient glue leading to a weak bond. Fresh glue easily wipes off with a damp cloth. Once dried, it’s a problem.
Work with clean hands. Fingerprints, especially on light surfaces, may become visible after applying the finish. Wash your hands regularly or work with thin gloves.
Apply the finish in thin layers. Three thin layers are better than one thick layer. Thin layers dry faster, provide a smoother surface, and avoid streaks. Between layers — light sanding with fine abrasive (P320-P400).
Use good lighting. During assembly and finishing, direct bright light at an angle onto the door — it will reveal all irregularities, gaps, and defects. What’s invisible under normal lighting will become visible under directional light.
Allow time for acclimatization. If decorative elements were stored in another room or just brought in from outside, let them acclimate in room conditions for a day. This prevents deformation due to humidity changes.
Protect your work during intermediate stages. If you pause between assembly and painting, cover the door with plastic film to prevent dust settling. If working in an active space, protect the door from accidental damage.
Typical mistakes and how to avoid them
Learning from others’ mistakes saves time and nerves. Here are the most common problems and how to avoid them.
Mismatched proportions — when panels are too narrow or too wide for the door size. Narrow panels 20-30 mm on a tall door 2100 mm look awkward and fail to create the desired scale. Wide panels 100 mm on a narrow door 600 mm consume the entire surface.
Solution: maintain proportion — panel width should be approximately 1/10–1/15 of the side size it frames. For a 800 mm wide door, an optimal panel width is 50–70 mm.
Gaps at joints — result of inaccurate trimming of elements. Especially noticeable on contrasting surfaces. A 1 mm gap on dark panels against a white door is very obvious.
Solution: use a quality miter saw with precise angle settings. Make test joints. For unavoidable gaps, fill with acrylic sealant in matching color.
Uneven spacing between rails — when distances slightly differ. The human eye is sensitive to rhythm disruptions, even a 2–3 mm difference is noticeable.
Solution: use a template — a piece of rail of the required length to measure each interval. Or make full marking at once, checking line parallelism.
Visible glue marks — protruding and dried glue forms bumps and shiny spots. Especially noticeable on tinted surfaces — glue doesn’t take the stain and remains light-colored.
Solution: wipe off protruding glue immediately with a damp cloth. If it has dried — carefully scrape it off with a knife, then sand. When staining, touch up problematic areas with a wood-colored marker.
Element delamination — when panels detach over time. Causes: poor surface preparation, insufficient glue, wrong glue choice, inadequate fixation during setting.
Solution: thorough surface preparation — sanding, degreasing, priming. Use the correct glue for the material combination. Secure firmly for 24 hours.
Color mismatch of elements — when panels after painting differ in color from the main surface or from each other. Cause: using different paint batches, uneven application, differences in material absorption.
Solution: buy paint with extra from one batch. Before painting, prime all surfaces to equalize absorption. Apply paint in several thin layers for evenness.
Overloaded composition — when too many elements, too fine division, excessive detail. The door looks busy and chaotic.
Solution: follow the principle 'better less, but better'. Two or three large panels are better than six to eight small ones. A simple, clear composition always wins over an overloaded one.
Style mismatch — when baroque panels are installed in a minimalist interior or simple rails in a classical setting. The door looks like an out-of-place element.
Solution: study the room’s style and repeat characteristic elements. If unsure — choose a simpler solution, as it’s more universal.
Trimming and casing: finishing the look
The decoration of the panel itself may be flawless, but if the door frame is uneven — the overall impression is ruined. Trim and casing complete the look, creating unity.
Trim — additional strips that extend the door frame when walls are thick. In standard situations, a 70–100 mm wide frame overlaps the thickness of brick or block walls. But if the wall is thicker or the frame is narrower — a gap forms between the frame and the wall surface. It’s covered with trim.
Trim can be a simple rectangular board matched to the frame color. This is a utilitarian solution, not drawing attention. But you can turn trim into a decorative element — use profiled boards, add panels, paint in contrasting colors.
Profiled casing with a relief cross-section creates a stepped transition from the frame to the wall. This emphasizes the depth of the opening and adds architectural character. The casing profile should coordinate with the profiles of the door casings and other elements.
Casing overlays repeat the panel composition — if the door has framed panels, similar (proportionally reduced) ones can be made on the casings. This enhances the sense of thoughtful design and stylistic unity.
Casing — the inner surfaces of the door opening. Usually, these are simply painted or plastered walls. But they can be transformed into part of a decorative system.
Casing cladding with wooden panels orrailscreates a unified wooden portal. Especially effective in classical interiors, where wood is the dominant material.
Moldings around the casing perimeter — at the junction of the casing and wall — create an additional frame, enhancing the emphasis on the door opening.Moldingsare selected to match the casings or contrast with them.
The color solution for casings affects the perception of the opening's depth. Dark casings create a deep shadow, making the opening appear deeper. Light casings visually open up the opening, making it feel lighter. Casings in the wall color blend boundaries, while contrasting casings emphasize them.
Specifics of different door types
Interior hinged doors — the most common type, suitable for all the described techniques. Standard sizes, rectangular shape, flat surface — ideal for decoration.
Double doors require coordination of composition between the panels. Symmetrical scheme — both panels are identical — a classic solution. Asymmetrical — each panel is unique — modern. It is important that when the panels are closed, the overall pattern remains cohesive.
Sliding doors limit the use of volumetric overlays — they may interfere with sliding. Better to use flat or low-profile elements. Lattice compositions are ideal for sliding structures.
Entrance doors usually have thicker panels and may be initially decorated. But even they allow additional decoration — especially on the interior side facing the hallway. Overlays, framing — create a sense of formality.
Cabinet and wardrobe doors — a separate field for creativity. Often these are large smooth surfaces of MDF or Laminated Particle Board, eager for decoration. Framed panels, lattices transform utilitarian cabinets into furniture elements.
When decorating cabinet doors, consider that they open frequently and are subject to stress. The adhesive joint must be especially secure. It is better to additionally fix large elements with small, headless nails.
Coordinating door decoration with interior design
A door does not exist in a vacuum — it is part of the interior, one of many elements. Door decoration must harmonize with the overall stylistic solution.
Repeating profiles — a key technique for creating unity. If the room has woodenBaseboardswith a specific profile, use overlays with a similar profile on the doors. If ceilingCrown Moldinghave a characteristic rounded edge, replicate it in the casings.
Color coordination can follow monochromatic (all wood of one tone) or contrast (doors accentually highlighted) paths. But chaotic mixing of colors is unacceptable — there must be a system.
Scale coordination means that the size of decorative elements corresponds to the room's scale. In a small room, large bulky overlays will overwhelm. In a large hall, small details will be lost.
Stylistic identity requires that doors speak the same architectural language as furniture and finishes. If the interior is Scandinavian — doors cannot be baroque. If neoclassical — industrial style is not allowed.
But controlled eclecticism is possible — combining elements of different styles provided that a unifying idea is found. For example, classical framed panels on doors can coexist with modern furniture, if the color palette and proportions are coordinated.
Budget considerations and sensible savings
Door decoration can vary greatly in cost — from several thousand to tens of thousands of rubles per door. Where can you save without sacrificing quality?
Material selection — the first factor.Solid oak overlayscost 3-4 times more than similar MDF ones. Solid wood is stronger and more noble, but if the overlays are painted with opaque paint — the difference is not visible. MDF with quality paint looks no worse.
Profile complexity affects cost. Simple rectangular overlays are cheaper than decorative ones with multiple rounded edges. For modern styles, a simple profile is both aesthetically justified and economical.
DIY installation saves 30-50% of the budget. Professional services are expensive, but the technology is accessible for self-execution. The key is care and following recommendations.
Avoiding expensive finishing techniques — gilding, complex patination, multi-layer coatings — reduces costs and time. Simple quality painting or tinting gives excellent results at reasonable prices.
Do not compromise on the quality of base materials and adhesive. Cheap veneers from poorly dried wood will warp. Weak adhesive won't hold elements. This is false economy leading to redoing work.
A sensible approach — quality materials plus simple elegant composition plus DIY installation. This provides maximum result-to-cost ratio.
Questions and answers
Can laminated doors be decorated?
Yes, laminated doors are ideal for decorating with applied elements. Proper preparation is essential — sanding to create texture, degreasing, and applying adhesive primer. Use adhesive suitable for smooth surfaces — liquid nails or mounting adhesive. After installation, you can paint the entire door with the applied elements for a unified look.
How long does it take to decorate one door?
With pre-made elements and a planned composition, installation takes 4-6 hours of pure time. Plus time for surface preparation (2-3 hours), cutting elements (1-2 hours), final finishing and painting (4-6 hours including drying time). In total, from start to finish, one door takes 2-3 days including technological pauses for drying.
What adhesive is best to use?
For wood to wood — carpentry-grade PVA class D2 or D3. D2 is suitable for indoor spaces with normal humidity, D3 — for spaces with higher humidity (kitchens, bathrooms). Polyurethane adhesive provides maximum strength and water resistance, but is more expensive and requires care — it expands upon setting and may squeeze out from joints. For wood to laminate, use liquid nails or special mounting adhesive — regular PVA holds poorly on smooth laminate surfaces.
Is it necessary to remove the door from hinges for decoration?
Highly recommended. Horizontal position ensures even application of applied elements, adhesive doesn't run, and clamping is more effective. Decorating a vertically hanging door is possible, but quality will be lower — elements may slide before adhesive sets, and tape fixation is less reliable. If removal is impossible, use fast-drying adhesive and temporary supports under each element.
How to care for decorated doors?
Care is standard for wooden surfaces. Wipe with dry or slightly damp soft cloth. Avoid abrasive cleaners and aggressive solvents. Painted surfaces can be refreshed with furniture polishes. Tinted oil-based finishes should be renewed with thin oil coats every 2-3 years. Check adhesive strength — if an element begins to detach, reattach it immediately before delamination spreads.
Can old doors with defects be decorated?
Yes, applied decoration is an excellent way to hide defects on old doors. Scratches, scuffs, and minor chips will be covered by applied elements or masked by painting. Deep dents should be filled before installing decoration. Moisture-swollen areas should be sanded. The key is to ensure the door is structurally intact and not delaminating. Decoration cannot save a door that is falling apart.
What tools are needed?
Minimum set: tape measure, square, pencil, handsaw or circular saw, sander or sandpaper, brushes for adhesive and paint, painter’s tape. Recommended: laser level, clamps, jigsaw, drill. Professional level: circular saw with precise angle adjustment, orbital sander, spray gun. However, most tasks can be completed with a basic set and patience.
How much do materials for decorating one door cost?
It depends on selected elements and decoration area. Simple composition with inexpensive MDF applied elements — 2000-3000 rubles. Mid-range option with wooden applied elements and door casings — 5000-8000 rubles. Premium solution withsolid oak applied elements, decorative moldings, rosettes — 12000-20000 rubles. Plus consumables — adhesive, paint, varnish, and other materials — another 1500-3000 rubles.
Can decoration be used on metal doors?
Technically possible, but more complex. Metal surface requires special preparation — degreasing, metal primer. Adhesive must be universal and hold on metal — epoxy or special structural adhesive. Wooden elements on metal create an interesting contrast, but materials have different thermal expansion, which may lead to delamination. Better to use polymer applied elements or special panels.
What about the door handle and lock?
Plan the composition considering their placement. Decorative frames should either bypass hardware or incorporate it into the composition. Often, the handle is located at the edge or within one of the panels — this looks natural.decorative rose outletsYou can place decorative elements around the door handle for emphasis. The lock hole can be accentuated with an applied element featuring a cutout.
Will applied elements withstand heavy use?
With proper installation — yes. Quality adhesive creates a bond stronger than wood itself. Applied elements experience minimal mechanical stress — doors do not bend or twist under normal use. The only risk is impact from heavy objects, but such impact will damage the door itself. In high-traffic public areas, it is recommended to additionally secure large elements with small headless nails.
Can decor be removed if it gets old?
Yes, but not without traces. The overlays can be carefully separated by trimming the adhesive seam with a thin knife or string. The door surface will have adhesive residue, and the finish may be damaged. Sanding, polishing, and possibly repainting the entire door will be required. Therefore, carefully plan the composition before installation — you’ll have to live with it for a long time.
Inspiration and references
Before picking up tools, gather a visual library of ideas. Study historical interiors — museums, palaces, mansions showcase classic door decoration samples. Analyze modern design projects in magazines and online platforms.
Pay attention to doors in beautiful interiors — hotels, restaurants, showrooms. Photograph what catches your eye. Break down the composition — how many panels, what proportions, what profile of overlays, how the color combination is resolved.
Create a references folder — save images you like, group them by style. This will help you formulate your own vision and avoid blind copying. Take ideas from different sources, combine, and adapt them to your conditions.
Sketch out options — even a rough hand-drawn sketch helps visualize the composition. Make several layout variations, compare them, and choose the best. You can use graphic editors — insert a photo of your door and overlay lines of future elements.
Consult professionals — designers, craftsmen. Show them your sketch and ask for their opinion. An experienced eye will spot errors in proportions and suggest improvements. Consultation may be paid, but it prevents costly mistakes.
Don't be afraid to experiment, but start simple. Let your first project be a minimalist composition with several elements. Once you gain experience and confidence, move on to more complex solutions.
Conclusion
Decorating doors using overlays, rails, and moldings — this is the art of quickly transforming space without radical interventions. The method combines accessibility, economy, reversibility with an impressive visual effect. A worn-out dull door becomes an architectural element setting the tone for the entire interior within a day.
The philosophy of overlay decoration lies in understanding that perception matters more than material reality. The human eye reads form, rhythm, proportions, light and shadow. Correctly installed elements create a convincing illusion of expensive construction, and this illusion functions as reality.
The technological accessibility of the method makes it democratic. No years of carpentry training are needed, no expensive equipment, no production base required. Carefulness, precision in measurements, understanding compositional principles — this is enough for success.
The variety of solutions is practically infinite. From strict classical framed panels to bold modern rail compositions, from monochromatic restraint to colorful eclecticism — everyone will find a solution resonating with their personal taste and the character of the space.
The economic logic is convincing. Material and labor costs are 5-10 times lower than the cost of new doors of comparable visual quality. Meanwhile, the basic door panel can serve for decades — only the decorative finish changes as interior preferences evolve.
The psychological effect of updated doors surpasses material investments. The space begins to be perceived differently — more thoughtfully, characteristically, individually. Guests notice details and ask about the work done. Pride in one’s own creativity emerges.
The decoration process is not merely a craft task, but a creative act. Choosing a composition, selecting elements, working with color requires an aesthetic sense. Every decision reflects the creator’s personality, their notions of beauty, harmony, and appropriateness.
Decorative Inserts, rails, Casings, MoldingsThese are tools of visual language, allowing you to formulate statements about style, status, and attitude toward details. Mastery of this language opens opportunities to transform space.
Start small — update one door, the least noticeable. Evaluate the result, analyze mistakes, accumulate experience. Then move on to more visible elements — the entrance door, living room doors. With each project, skill grows, solutions become bolder, and results are impressive.
Don't fear imperfection in the early stages. Even professional craftsmen once started with simple projects and learned from mistakes. What matters is not initial perfection, but willingness to improve, attention to detail, respect for material and process.
Surround yourself with inspiration — study the works of masters from the past and present, analyze techniques, understand the logic of decisions. But don’t copy blindly — adapt ideas to your own conditions, add personal nuances, create unique compositions.
Invest in quality materials. The difference in cost between mediocre and excellentappliqués from solid woodamounts to several thousand rubles, but this difference is critical for durability and visual quality of the result. Saving on materials is false economy, leading to redoing work.
Respect the technology. Each stage — surface preparation, precision cutting, quality gluing, finishing — is important for the final result. Skipping or careless execution of any stage compromises the entire work. Methodicalness and attention to detail are the keys to success.
Share your experience. If a project succeeds — tell friends, show the result, explain the technology. Passing on knowledge makes you an expert, helps others avoid your mistakes, and builds a community of interior decoration enthusiasts.
STAVROS company offers a full range of elements for door decoration. The catalog includesoverlays of various profiles and sizesmade from natural oak, ash, beech — species ensuring longevity and noble appearance.Wooden planksof various cross-sections for modern minimalist compositions.Casingsof classic and modern profiles for framing door openings.
Moldings and corniceswith detailed ornamentation for accentuating compositional focal points.decorative rose outletswith carved ornaments for accentuating compositional focal points.
All elements are manufactured in-house by STAVROS from carefully selected wood with controlled humidity and processing quality. Precision in dimensions, clean profiling, and batch consistency — parameters ensuring easy installation and visual perfection of the result.
STAVROS professional consultants will help you select elements tailored to your project. Tell us about door dimensions, desired style, and budget constraints — receive recommendations for the optimal component set. Consultation is free and does not obligate you to purchase.
Delivery within Moscow and shipping to regions ensure STAVROS products are accessible to everyone wishing to refresh their interior. Packaging guarantees element safety during transport. The option to return if expectations are not met reduces risks.
The STAVROS website features photos of completed projects where decorative elements were used to transform doors. Study examples, draw inspiration, and envision your own compositions. Each project is unique, and every door tells its own story.
STAVROS product quality is confirmed by years of experience working with designers, builders, and private clients. Customer reviews highlight precision in dimensions, surface finish quality, and reasonable price-to-quality ratio. Choosing STAVROS means choosing reliability.
Create doors that will become a pride of your interior. Doors you’ll enjoy looking at every day. Doors that will impress your guests. Doors that reflect your taste, character, and attention to detail.Door Decoration— it’s a quick way to transform your interior, accessible to everyone. STAVROS provides the tools for this transformation. The rest depends on you — your vision, your care, your willingness to create.
Start today. Measure your doors, sketch your composition, select elements from the STAVROS catalog. In a few days, your interior will change — it will become more expressive, distinctive, and individual. And all of this — your hands’ work, your creativity, your achievement. Doors are not just functional structures. They are opportunities for self-expression. Use them.