Article Contents:
- Diagnosis and Assessment of Condition: To Save or Replace
- Visual Inspection of Wooden Elements
- Checking for Biological Damage
- Assessment of Moldings Condition
- Decision: Restore or Replace
- Removing Old Coatings: Cleaning to the Base
- Mechanical Removal of Paint
- Chemical Removal of Multi-Layer Coatings
- Removing Old Coatings from Polyurethane
- Restoring Wood Integrity: Putty, Inserts, Veneer
- Filling Cracks and Chips
- Restoring Chips and Dents
- Strengthening Delaminated Wood
- Restoring Profile with Veneer
- Combined Restoration: Replacing Sections with Polyurethane
- Profile Identification and Selection
- Technology of Joining Wood and Polyurethane
- Aligning Transitions
- Matching Profile: Precision – The Key to Invisibility
- Measuring Complex Profiles
- Adapting Profile for Minor Deviations
- Creating Smooth Transitions at Joints
- Final Painting: The Unifying Finale
- Pre-Painting Preparation
- Choosing Paint and Color
- Paint application techniques
- Decorative Finishing Techniques
- Quality Control of Restoration
- Criteria for Quality Restoration
- Typical Restoration Mistakes
- Conclusion

Time is merciless to interiors. Wooden skirting boards, once the pride of the house, develop cracks, paint peels off, chips and dents appear. Ceiling moldings yellow, accumulate dust, and individual elements detach. But this is not a death sentence. In most casesOld wooden skirting boardsand historical moldings can be restored to a state indistinguishable from new decor.
Restoration is not just cosmetic repair. It is an art of returning elements to their original beauty, preserving historical value, and extending the life of quality materials. This is especially relevant for historical buildings, Stalin-era apartments, old mansions, where original wooden and plaster elements are part of architectural heritage.
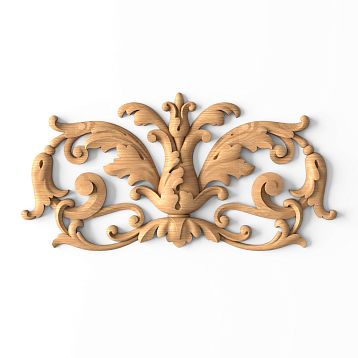
Modern technologies allow combining traditional wood restoration methods with modern materials.Polyurethane molding photowhich demonstrates a variety of profiles, can ideally replace lost fragments of historical decor, provided the appropriate profile is selected. This saves time, reduces restoration costs, without compromising the quality of the result.
In this article, we will thoroughly examine the entire restoration process—from diagnosing the condition of old wood to the final painting. You will learn how to determine the extent of damage, when an element can be restored versus when it’s better to replace it, how to properly remove old finishes, restore wood integrity, select modern replacements for lost fragments, and achieve perfect visual compatibility.


Diagnosis and Assessment: Save or Replace
The first and critically important stage of restoration is an honest assessment of the condition of elements. A romantic impulse to 'save everything original' may result in wasted time and money if the element is beyond repair. On the other hand, hasty replacement destroys historical value and uniqueness of old elements.


Visual Inspection of Wooden Elements
Begin with a careful inspection of every meter of skirting board or molding. Note the integrity of the wood, presence of cracks, chips, areas of rot. Light surface scratches and paint chips are cosmetic defects easily remedied. Deep cracks running through, areas with splintered wood are more serious problems requiring structural restoration.
Check the density of the wood. Press suspicious areas with a nail or screwdriver. Healthy wood is hard; the nail enters with difficulty. If the nail easily penetrates the wood to a depth of more than 5 mm, this is a sign of rot. Such areas must be completely removed and replaced.
Note deformations. Wooden elements exposed to moisture often warp or twist. Minor deformations (bend up to 5 mm per meter of length) can be corrected during reinstallation. Severely deformed elements are better replaced—straightening them without risk of cracking is practically impossible.
Check the mounting of elements. Loose, easily removable skirting boards must be dismantled for restoration. If the element begins to break apart or crumble during removal, this is a warning sign of critical wood condition.
Our factory also produces:


Check for biological damage
Wood-boring beetles, mold, fungus—these are the main enemies of wood. Typical signs of beetle infestation are small round holes 1–2 mm in diameter, from which wood dust emerges. If tapping produces a dull sound and fresh holes with light-colored wood dust are visible on the surface, beetles are active and the wood is being destroyed from within.
Surface damage (a few holes per meter) can be stopped by treating with insecticides. Severe infestation (dozens of holes, wood sounds dull when tapped, easily crumbles) indicates that the wood structure is destroyed. Such elements are not restorable—they are dangerous and may collapse under load.
Mold and fungus appear as dark or greenish spots, surface mold, and a characteristic musty odor. Surface mold is mechanically removed and treated with antiseptics. Deep fungal damage (wood darkened throughout, became loose, easily separates) is irreparable—affected areas must be cut out and replaced.
Get Consultation
Assessment of Moldings Condition
Polyurethane and plaster moldings have different typical damages. Polyurethane elements do not rot or suffer biological damage, but may detach (if the adhesive has lost its properties), yellow over time, develop cracks at joints, and lose relief detail due to multiple thick paint layers.
Check the strength of mounting. Gently press on the element—it should not detach from the surface or spring back. If a crunch is heard upon pressing and the element moves, the adhesive bond is broken and requires re-adhesive.
Inspect joints. Cracks at joints are a typical problem with old moldings. They appear due to thermal deformation, building shrinkage, and vibrations. Small cracks up to 2 mm wide are easily filled with putty. Wide cracks (over 5 mm) with misalignment of elements indicate serious problems—possibly requiring dismantling and reinstallation of the section.
Check the integrity of relief. If the relief is smoothed and details are blurred, this is due to multiple thick paint layers. Sometimes, under 10–15 layers of paint, the original relief is completely invisible. Such elements require chemical removal of all paint layers to restore detail clarity.
Decision: Restore or Replace
Decision Criteria:
Restore if:
-
Structural integrity is preserved (wood is dense, without deep rot)
-
Deformations are minimal (bend up to 5 mm per meter)
-
Biological damage is surface-level or absent
-
Element has historical value (historic profile, hand-carved details)
-
Restoration cost is lower or comparable to replacement cost
Replace if:
-
Wood heavily damaged by rot or insects (more than 30% of volume)
-
Strong deformations (bending more than 10 mm per meter)
-
Multiple deep cracks, structure compromised
-
Element is serial, lacks unique features, easily replaced with a modern equivalent
-
Restoration cost significantly exceeds replacement cost
Combine (restore partially, replacing hopeless sections), if:
-
Most of the element is in good condition, but has localized damage
-
Unique profile, but modern equivalents with similar shapes exist
-
We want to preserve as much original material as possible at reasonable cost
Remove old coatings: clean down to the base
Quality restoration requires removal of all old paint, varnish, and dirt layers. Working on freshly painted old coatings will only provide a temporary cosmetic effect – problems will return within a year or two.
Mechanical paint removal
For wood with relatively few paint layers (2-4 layers), mechanical cleaning is effective. Use coarse sandpaper (grit 60-80) on a sander or manually with a hand scraper.
Work in a respirator – dust from old paint is toxic, especially if it’s Soviet-era paint containing lead. Sand along the grain of the wood, not across – this causes fewer scratches. Periodically change the sandpaper – when clogged with paint, it stops cutting and begins polishing and heating the surface.
For flat surfaces, use an eccentric sander – it’s fast and effective. For profiled moldings and baseboards with relief, use narrow strips of sandpaper, sanding pads that match the profile shape.
Goal – remove paint down to the wood. Residual paint in wood pores and deep relief grooves is acceptable – it will be removed by chemical strippers in the next step. Mainly, remove the bulk of paint mechanically, because it’s faster and cheaper than chemical methods.
Chemical removal of multi-layer coatings
If the wood has 7-10 or more paint layers (typical forold wooden baseboardsin apartments with long histories), mechanical removal becomes a nightmare. Here, chemistry is needed – specialized paint strippers.
Strippers come in alkaline (based on caustic soda) and organic (based on solvents). Alkaline ones are cheaper but aggressive and may darken the wood. Organic ones are gentler on wood but more expensive and have a strong odor. For valuable elements, choose organic; for ordinary ones, alkaline ones are suitable.
Application technique: apply stripper in a thick layer (3-5 mm) with a brush to a 50-70 cm section. Cover with polyethylene film to prevent evaporation. Let it sit for the time indicated on the package (usually 30 minutes to 2 hours). The paint will soften, swell, and begin to flake off.
Remove softened paint with a putty knife, scraper, or metal brush. Work carefully, avoiding scratches on the wood. For relief areas, use an old toothbrush or wooden toothpicks. Rinse the surface with water (for alkaline strippers) or white spirit (for organic), to neutralize any remaining chemicals.
If after the first application, paint is not fully removed, repeat the procedure. Sometimes 3-4 cycles are needed to remove all layers. Patience pays off – clean wood with an open texture, ready for restoration.
Removing old coatings from polyurethane
Polyurethane moldings under multi-layer paint lose relief definition. A 2-3 mm paint layer turns fine details into blurred bumps. Removing paint restores the original expressiveness to the elements.
For polyurethane, use only specialized strippers designed for plastics. Ordinary aggressive strippers may dissolve the polyurethane itself. Test the stripper on an inconspicuous area – apply a drop, wait 10 minutes. If the polyurethane hasn’t changed, the stripper is suitable.
Alternative to chemical stripping – thermal method. A construction hair dryer heats paint to 150-200 degrees, softening it for easy removal with a putty knife. But be careful – overheating (above 250 degrees) will deform the polyurethane. Keep the dryer 10-15 cm away, heat in small sections, constantly checking temperature by hand.
Thermal method is not suitable for plaster moldings – plaster cracks under sudden heating. Only chemical strippers or very careful mechanical cleaning with fine putty knives and scrapers.
Restoring the integrity of the wood: putty, inserts, veneer
After removing finishes, all wood defects become visible – cracks, dents, areas with splintered wood. These must be addressed by restoring structural integrity and surface smoothness.
Filling cracks and chips
Small cracks (up to 2 mm wide, up to 5 mm deep) are filled with special wood putty. Choose putty to match the wood tone – dark for oak, light for pine. Modern acrylic putties can be tinted to any wood color.
Before applying putty, widen and deepen the crack with a narrow chisel or knife. This ensures better putty adhesion. Clean the crack with a brush, then prime with PVA liquid glue or a special primer – this helps the putty bond better.
Fill the crack with putty, pressing it in with a narrow putty knife. Apply slightly in excess – putty shrinks upon drying. Level it flush with the surface. Allow to dry (usually 4–6 hours), then sand lightly (grit 180–220).
Deep cracks (more than 10 mm deep) cannot be filled with putty – they will shrink and crack. First, fill the depth with epoxy resin or liquid epoxy putty (which does not shrink). After the epoxy hardens, apply a thin layer of acrylic putty to match the color.
Restoring chips and dents
Large chips and dents (area over 5 cm², depth over 5 mm) require wooden inserts. Cut the chip to a proper geometric shape – square, rectangle, trapezoid. Select a piece of wood of the same species, with grain direction matching the original.
Carve the insert to fit the cavity size. It should fit snugly with slight tension. Glue with wood glue or epoxy resin. Clamp in place until dry (4–12 hours depending on glue). After drying, plane the insert flush with a hand plane, then sand it smooth.
For complex profiled elements, cutting an exact insert is difficult. It’s easier to use epoxy putty or epoxy resin mixed with wood flour (shavings). This mixture does not shrink, sands well, and is as strong as wood. Shape the profile with putty knives while the epoxy is still wet. After hardening, refine the shape with files and sandpaper.
Strengthening delaminated wood
Old wood, especially exposed to moisture, often delaminates along growth rings. Scales form, protruding and easily breaking off. These must be re-glued.
Carefully lift the delaminated section without fully breaking it off. Apply liquid wood glue or epoxy resin with a brush or syringe underneath. Press the delaminated section firmly. Secure with weight or painter’s tape until the glue dries.
If delamination is extensive (over 30% of the element’s area), you can impregnate the entire wood with liquid epoxy resin. It will fill cracks, strengthen the structure, and bind the separated fibers. After impregnation, the wood becomes stronger and more moisture-resistant, but loses its natural character – it won’t absorb stain and is difficult to further process.
Restoring profile with veneer
For elements with complex profiles (ornamental moldings, carved details), where part of the profile is splintered or worn, you can restore the shape using veneer – thin wood sheets 0.5–3 mm thick.
Cut a strip of veneer to the required width. If the profile is curved, bend the veneer. To do this, steam it – hold it over boiling water for 5–10 minutes or wrap it in a damp cloth for an hour. Wet veneer is flexible and easily takes the desired shape.
Glue the veneer with wood glue or epoxy, press it onto the surface, and secure with painter’s tape or clamps. After drying, shape the glued veneer with a hand plane, files, and sandpaper to form the desired profile. For complex profiles, multiple layers of veneer may be needed, building up the volume layer by layer.
Combined restoration: replacing sections with polyurethane
Sometimes, local damage to a wooden element is so severe that restoration is not worthwhile, but replacing the entire element is regrettable – the rest is in excellent condition. The solution is hybrid restoration: preserve intact wood sections, and replace damaged sections with polyurethane elements of matching profile.
Identification and selection of profile
The first task is to find a polyurethane element with a profile as close as possible to the original wood. Measure the height, width, and profile shape of the wooden element. Photograph it under good lighting to clearly show all curves.
Study catalogs of polyurethane decor manufacturers.Polyurethane molding photoCatalogs with size specifications will help find a close match. For standard baseboards and cornices from the Soviet period, exact modern equivalents are often available – profiles changed little.
For unique historical profiles, an exact match may not exist. Choose the closest option. Minor differences (1–2 mm in height, slightly different curve radius) will be barely noticeable after painting, especially if the transition between wood and polyurethane is in an inconspicuous area.
If no standard profile fits, consider custom manufacturing of a polyurethane element. Some manufacturers offer custom fabrication based on individual drawings. This is more expensive, but justified for restoring historical interiors.
Technology for joining wood and polyurethane
Proper joining of dissimilar materials is key to successful hybrid restoration. Wooden and polyurethane elements have different coefficients of thermal expansion, different stiffness, and react differently to humidity. The joint must compensate for these differences.
Prepare the wooden element: cut off the damaged section so the cut aligns with healthy wood. The cut must be straight and perpendicular to the element’s axis. Sand the end with fine-grit sandpaper. Prime with acrylic primer to improve adhesive bond.
Prepare the polyurethane element: cut to the required length with precise bevel angle (usually 90 degrees). The polyurethane profile must exactly match the wood profile – check by fitting the elements together. If there are minor discrepancies, trim the polyurethane with a file or sandpaper.
Gluing: use polyurethane glue (Soudal, Ceresit) – it provides a strong, elastic bond that compensates for thermal deformation. Apply glue to both ends, press the elements tightly together. Secure with painter’s tape or clamps for 24 hours.
Joint reinforcement: to increase strength, use hidden reinforcement. Drill holes at the ends of both elements with 8–10 mm diameter and 30–40 mm depth. Insert wooden dowels or metal rods using epoxy resin. This creates a mechanical locking joint that complements the adhesive bond.
Transition leveling
Even with perfect profile matching, micro-discrepancies may exist – wood has shrunk over decades, and the profile has slightly deformed. The transition between materials must be invisible.
If the polyurethane is slightly wider than the wood (difference up to 2 mm) – remove excess with a file or sandpaper, forming a smooth transition. If the wood is slightly wider – build up the polyurethane with a thin layer of epoxy putty, forming the missing volume. After curing, sand smooth.
Fill the joint with elastic acrylic sealant, carefully leveling it. Goal – when running a hand across the joint, no step or unevenness should be felt. After sealant dries, sand the transition with fine sandpaper (grit 240–320) until absolutely smooth.
Profile match: precision is the key to invisibility
The success of combined restoration depends on precise profile matching. If the wood and polyurethane profiles differ noticeably, no paint will hide the difference. If matched precisely – after painting, the joint is practically invisible.
Measuring complex profiles
For precise measurement of profiled elements, use a profile template (contour gauge) – an instrument with multiple movable pins that replicate the surface shape. Place the contour gauge against the end of the wooden element; the pins will take the profile shape. Transfer the shape to paper by tracing the outline.
Alternative – the impression method. Mix soft clay or modeling clay, press it against the end of the element, and obtain an inverse profile impression. Pour plaster into the impression – you’ll get a positive profile copy that can be compared against polyurethane element samples.
Digital photography with a scale ruler in frame also helps. Photograph the element’s end in close-up, ensuring the camera is perpendicular to the end plane to avoid distortion. Print the photo at actual size (using the in-frame ruler for scaling). Overlay the print against sample elements for comparison.
Profile adaptation for minor discrepancies
If the found polyurethane profile differs slightly from the original (height/width discrepancy up to 3 mm, similar curve shape), it can be adapted through mechanical processing.
Removing excess: if the polyurethane element is slightly larger than the original, remove the excess with coarse sandpaper on a block or with a file for soft metals. Work carefully, constantly comparing with the original. Polyurethane cuts easily, but overcutting is easy – you can remove excess, but you cannot reattach it.
Adding volume: if the polyurethane is slightly smaller, form the missing volume with epoxy putty. Apply putty to the required area, shape the profile with putty knives while it’s still pliable. After curing, refine the shape with files and sandpaper. Epoxy putty, after curing, is hard, easy to work with, and holds its shape.
Creating smooth transitions at joints
Even with perfectly matching profiles, the joint between two elements will be visible unless a smooth transition is created. Micro-transition technique: slightly modify the profile 5–10 cm on both sides of the joint, creating a gradual change in shape.
For example, if the wooden element has become slightly narrower due to shrinkage, gradually file the polyurethane starting 10 cm from the joint, creating a smooth taper toward the wooden part. The eye perceives gradual change as a feature of shape, while a sharp step appears as a defect.
To create micro-transitions, use a sander with fine-grit paper (grit 120–180), working at low speed. Periodically check the result by running your hand over the surface – no sharp transitions should be felt.
Final painting: the unifying chord
Painting – the final stage that visually unites wood and polyurethane into a single whole. Properly executed painting makes the joint completely invisible.
Pre-painting preparation
Wood and polyurethane require different preparation. Wood is porous and intensely absorbs paint. Polyurethane is dense and smooth, accepting paint in a thin layer. The goal – equalize absorption capacity.
Wood priming: use a wood primer with pore-filling (covering) properties. It contains solid particles that fill wood pores, creating a less absorbent surface. Apply in 2–3 coats with intermediate drying and sanding. Goal – wood should not show through, surface should be smooth and uniform in tone.
Polyurethane priming: use universal acrylic primer. It creates a thin film that improves paint adhesion. One coat is sufficient. Pay special attention to joints and filled areas – they may differ in absorption, requiring an additional primer coat.
After priming, inspect the surface for transparency. Shine a flashlight along the element at a sharp angle – all irregularities, scratches, and un-sanded areas will be visible. Eliminate defects with additional sanding and priming.
Choosing paint and color
To unite wood and polyurethane, use opaque paints that conceal the underlying material. Water-based acrylic paints are the optimal choice – they suit both materials, dry quickly, are odorless, and form a durable coating.
Gloss level is chosen by preference and interior style. For historical interiors, matte or semi-matte paint is preferred – this was the original finish. Glossy paint is a modern choice; it highlights texture but requires perfect surface preparation.
The paint color can be any, but traditionallyold wooden skirting boardswere painted white, cream, or bone. These colors are universal, visually lighten elements, and suit any style. For eclectic interiors, you can use saturated colors – blue, green, burgundy.
Paint application technique
First layer – base. It absorbs into the substrate and may lay unevenly. Do not aim for perfect coverage in the first pass. Apply thinly with a medium-bristle brush (width 4–6 cm). Carefully paint grooves, joints, and transitions between wood and polyurethane.
Allow the first layer to dry completely (time indicated on the can, usually 2–4 hours for acrylic paints). Do not rush – insufficiently dried paint will form lumps when applying the next layer.
Second layer – covering. It creates the final color and texture. Apply evenly, ensuring no drips in the profile grooves. Stroke the brush along the element, not across – this minimizes brush marks.
Pay special attention to joints and transitions between materials. This is where differences in paint absorption are most visible. If after the second layer the joint is noticeable (one material is darker than the other), apply a third layer spot-on, only to the problematic area.
Decorative finishing techniques
For historical interiors, patination is appropriate – creating an effect of noble antiquity. Using a sponge, a darker paint (brown, umber, dark green) is applied over a light base layer and immediately partially wiped away. The dark pigment remains in the profile grooves, emphasizing the relief and creating an illusion of aged patina.
Artificial aging with craquelure (crack network) is performed using special craquelure lacquer. It is applied between two layers of paint of different colors and cracks upon drying, revealing the lower layer through the cracks. This creates an effect of old, cracked paint.
To stylize as valuable wood species, use artificial texture technique. Using special brushes, sponges, and brushes on fresh paint, a pattern imitating wood grain is created. After drying, the surface is coated with matte lacquer – resulting in an illusion of natural wood.
Quality restoration control
Quality restoration should be invisible. After completion, the restored element should look new but retain the spirit of the original. No visible joints, transitions, or patches.
Criteria for quality restoration
Structural integrity: the element is strong, does not sag under load, is not loose. All fasteners are secure. A light tap produces a clear, not dull sound (a dull sound indicates internal voids or unsealed areas).
Surface: absolutely smooth, without dents, bumps, scratches. Running a hand over it does not reveal transitions between materials, filled or unfilled areas. Viewed at a sharp angle under light, the surface is uniform.
Profile: clear, all lines straight, curves smooth. Relief is well-defined, details are not blurred. The profile is consistent along the entire length of the element, without distortions or deformations.
Joints: not noticeable. Upon close inspection, a joint location can be found, but it does not stand out. No gaps, steps, or color differences. The joint between wood and polyurethane is visible only upon very close inspection.
Painting: even, without drips, missed areas, brush strokes. Color is uniform across the entire surface. Relief is fully painted, including deep grooves. Sheen (or matte finish) is consistent across all areas.
Typical restoration errors
Insufficient cleaning of old paint – remaining layers flake off after several months, dragging the new coating with them. Poorly sanded joints – they appear as lines or steps after painting. Inappropriate polyurethane profile replacement – the transition between materials is noticeable.
Poor crack filling – shrinkage of filler causes indentations at crack sites after 2–3 months. Insufficient wood moisture protection – unprimed ends absorb moisture, causing deformation. Thick paint layers – hide relief, making the surface "plastic."
Conclusion
Restoration of old decor is not only cost-effective (though often cheaper than full replacement), but also preserves history, uniqueness, and soul of the interior.old wooden skirting boardsProfessionally restored, they serve for another decade, delighting with the warmth of natural wood and the quality of old masters.
A combined approach – preserving original wood in good condition and replacing hopeless sections with polyurethane – provides the optimal balance of authenticity and practicality.relief decoration installationwhich is made using modern technologies, integrates perfectly with historical elements.
STAVROS Company offers a wide range of polyurethane elements of various profiles – from simple skirting boards to complex historical moldings. The catalog includes profiles matching most historical samples, making restoration accessible and high-quality. Professional consultations will help select the ideal profile for your restoration project, providing technical support throughout all stages of work. Preserve the beauty of the past using modern technology with STAVROS – and your interior will find a second life, combining historical value with modern durability.