


Article Contents:
- Typology of Corner Elements: From Function to Form
- Internal Corner Elements
- External Corner Elements
- Universal Corner Elements
- Connecting elements
- Materials: Properties and Application Areas
- Natural Wood
- Polyurethane
- Gypsum
- MDF and Composite Materials
- Professional Installation: Step-by-Step Technology
- Stage One: Composition Design
- Stage two: surface preparation
- Stage 3: Marking
- Stage Four: Installation of Corner Elements
- Stage Five: Installation of Straight Molding Sections
- Stage Six: Finishing Treatment
- Typical mistakes and how to avoid them
- First Mistake: Size Mismatch
- Second Mistake: Stylistic Dissonance
- Third Mistake: Inaccurate Marking
- Fourth Mistake: Weak Fastening
- Fifth Mistake: Ignoring Acclimatization
- Answers to Common Questions
- Can Polyurethane Corner Elements Be Painted to Look Like Wood?
- How to Choose a Corner Element if the Molding is Non-Standard?
- How Much Do Corner Elements Cost?
- Can Internal Corner Elements Be Used on the Facade?
- How to Care for Installed Corner Elements?
- Is It Mandatory to Use Corner Elements or Can One Manage by Mitering Moldings?
- Conclusion: Create Flawless Interiors with STAVROS

Corners in interiors are points of tension, places where planes, directions, and lines meet. It is here that the finisher's skill is tested, and it is here that all flaws of unprofessional installation become visible.Corner decorative elementsturn a potential problem into an architectural virtue, making molding joints not the weak link of the composition but its decoration and accent.
The traditional method of corner finishing requires jeweler-like precision—each molding is cut at a 45-degree angle and joined with the adjacent one; the slightest cutting inaccuracy leads to a gap.Corner Ceiling ElementorCorner Element for Moldingsolves the problem radically—a ready-made part covers the corner, and straight molding sections are simply cut perpendicularly and joined to it. Installation speed increases three to four times, and the quality of the result ceases to depend on miter box skills.


Typology of Corner Elements: From Function to Form
Wooden Corner Elementsand their polyurethane analogs differ in purpose, construction, and degree of decorativeness.


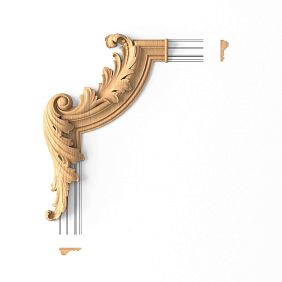
Internal Corner Elements
Internal corners — the junctions where two walls meet, or a wall meets the ceiling — require concave-shaped elements.Mold Corner ElementThe element for an internal corner has the shape of a quarter-sphere or a segment with a 90-degree opening angle. On both sides, there are mounting surfaces for connecting to straight sections of molding, replicating its profile.
The simplest internal corner elements are essentially pieces of molding bent or cut at a right angle. They replicate the profile of the main molding without additional decoration. Such elements are inconspicuous, serving a purely functional purpose by achieving a neat joint. They are used in minimalist interiors where ornamentation is inappropriate.
Decorated internal corners feature a central ornament — a rosette, cartouche, or floral motif. Such anCorner finishing elementelement becomes an accent, attracts the eye, and enriches the composition. In classical interiors with high ceilings and abundant decoration, ornamented corners are a mandatory element.
The size of an internal corner element is determined by the width of the molding. For narrow molding of 30-50 millimeters, the corner element has a side of 40-60 millimeters. For wide molding of 80-120 millimeters, it is 100-150 millimeters. An overly large corner element overwhelms the molding, while one too small gets lost.
Our factory also produces:


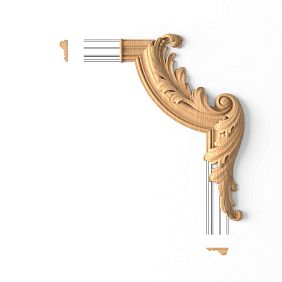
External corner elements
External corners — protruding parts of walls, columns, pilasters, bay windows — require convex-shaped elements.Facade Corner ElementsElements for external corners serve not only a decorative but also a protective function — the vulnerable spot, prone to accidental impacts and mechanical damage, is reinforced with a sturdy element.
The shape of an external corner element is a triangular prism with a 90-degree angle or a rounded quarter-cylinder. The second shape is softer, safer upon accidental contact, and characteristic of classical interiors. The prismatic shape is stricter and used in modern, laconic solutions.
The decoration of external corners can be more modest than that of internal ones — the protruding element itself attracts attention. A light relief repeating the molding's ornament is sufficient. But in luxurious interiors, external corners are richly adorned — applied acanthus leaves, volutes, and mascaron turn a simple corner into a sculptural object.
Get Consultation
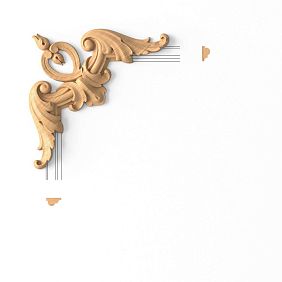
Universal corner elements
SomeDecorative corner elementshave a symmetrical form, allowing them to be used for both internal and external corners. These are square or round rosettes with relief, which are attached over the joint of moldings in the corner. Such elements are not integrated into the molding's profile but are applied on top, creating an additional decorative layer.
Universal corner overlays are convenient for complex compositions where moldings form frames on walls — the number of corners is high, and using specialized elements for each would be expensive. A standard rosette, repeated in all corners, creates rhythm and organizes the composition.
Connecting elements
In addition to corner elements, there are central connecting overlays — decorative parts placed on straight sections of molding. They break up a long line, create accents, and mask joints when extending molding.Corner elements for wallsCorner and central overlays are often used together, forming an integrated decorative system.
Central elements have an elongated shape — oval, rectangle — with an ornament echoing the corner details. A symmetrical composition places a central overlay in the middle of the wall between two corner elements. An asymmetrical one involves arbitrary placement of accents.
Materials: Properties and Applications
Material selectioncorner decorative elementsThe material determines appearance, durability, installation technology, and cost.
Natural wood
Wooden Corner ElementsSolid oak or beech — a premium solution for interiors where the naturalness of the material is fundamental. The wood's texture, its tactile qualities, its ability to age beautifully, acquiring a patina of time — are unique properties not reproduced by artificial materials.
Oak is a hard, dense wood with a pronounced pattern of large vessels. Color varies from light yellow to dark brown depending on treatment. Oak is strong, resistant to moisture and mechanical damage. Oak corner elements last for decades, withstand multiple restorations — stripping old finishes, repainting, or re-staining.
Beech is lighter than oak, with a fine-grained, uniform texture of a pinkish-yellow hue. Hardness is comparable to oak, but beech is more sensitive to humidity fluctuations. For interior elements in rooms with a stable microclimate, beech is optimal — it processes, polishes, and paints well.
Manufacturing wooden corner elements begins with selecting kiln-dried blanks with a moisture content of 10-12 percent. Milling is performed on high-precision CNC machines that reproduce complex relief. For elements with deep carving, multi-axis machining is used. Final sanding is done manually — the craftsman goes over all relief areas, removing burrs and emphasizing details.
The finish of wooden elements can be transparent — oils, varnishes that highlight the texture — or opaque — enamels that create a uniform color. In classical interiors, painting white followed by patination is common — gold or silver patina highlights the recesses of the relief, creating an effect of antiquity and luxury.
Disadvantages of wooden elements — high cost (3-5 times more expensive than polyurethane counterparts) and sensitivity to operating conditions. In rooms with variable humidity, wood can warp. Installation requires precise fitting, use of quality adhesive and fasteners.
Polyurethane
Corner Polyurethane ElementPolyurethane — a modern solution combining decorativeness, practicality, and an affordable price. Polyurethane is a dense, rigid plastic formed by injection molding. The technology allows reproduction of the most complex reliefs with minute details unattainable in wood carving.
The density of polyurethane for decorative elements is 450-650 kilograms per cubic meter — 1.5-2 times lighter than wood. Lightness simplifies installation, reduces load on walls, especially important when installing large elements on drywall structures. At the same time, polyurethane is sufficiently rigid and does not deform under its own weight.
Moisture resistance is a key advantage. A water absorption coefficient of less than one percent allows the use of polyurethane elements in bathrooms, kitchens, and other damp areas without risk of swelling, deformation, or biological damage. Wood in such conditions requires special treatment and still lasts less.
The temperature stability of polyurethane — from minus 60 to plus 80 degrees Celsius — is wider than that of wood. This allows the use of elements not only in interiors but also on facades, verandas, and open terraces.Facade Corner ElementsPolyurethane elements withstand frost, summer heat, and direct sunlight without cracking or fading.
Polyurethane's paintability is universal — any water-based, alkyd, or acrylic paints are suitable. The surface is smooth and does not require complex preparation. Light sanding with fine-grit sandpaper is sufficient to create micro-texture, which improves adhesion. One coat of primer and two coats of paint yield a perfect result.
The drawbacks of polyurethane are subjective. The material lacks wood texture — even high-quality oak-toned staining won't deceive upon close inspection and touch. For some, this is critical; for others, it doesn't matter, especially when elements are placed high and painted in a solid color.
Plaster
Plaster corner elements are a traditional solution, common in historical interiors. Plaster allows for the creation of the finest relief details and fragile elements that are impossible in wood or polyurethane. Handmade plaster molding is a piece-by-piece work; each element is unique.
However, plaster is fragile, susceptible to impacts, and intolerant of moisture. The weight of plaster elements is 5-7 times greater than polyurethane ones; installation is complex and requires robust mechanical fastening. Plaster cannot be trimmed on-site — any adjustment requires a sculptor's work. Modern construction has largely abandoned plaster molding in favor of polyurethane and wood.
MDF and composite materials
For corner elements of simple geometric shape without complex relief, MDF is used. Corner strips, protective corners, and simple overlays are milled from MDF, primed, and painted. Cost is minimal, quality is sufficient for budget projects.
Composite materials — mixtures of polymers with wood flour — occupy an intermediate position between polyurethane and wood. They are lighter than wood, have a pleasant texture, but are less detailed than polyurethane. They are used limitedly, mainly for facade decor.
Professional installation: step-by-step technology
Installation qualitycorner decorative elementsdetermines the final result no less than the quality of the elements themselves.
Stage one: composition design
Before purchasing materials, create a composition sketch. Measure the room, draw the walls to scale, and mark the placement of moldings and corner elements. Consider symmetry — if wall framing with molding frames is planned, they must be the same size and positioned at the same height.
Determine the quantity and type of corner elements. For a rectangular room with perimeter ceiling molding, four internal corner elements are needed. If frames are created on walls — each frame adds four corners. For complex compositions, the number of corners can reach dozens.
Select the size of the elements.Buy corner moldingshould be the same size as the main molding or slightly larger. A corner element for molding 50 millimeters wide should have a side of 60-70 millimeters. For molding 100 millimeters wide — 110-130 millimeters.
Coordinate the style. If the molding has a floral pattern, the corner element should have similar motifs. A geometric molding profile requires geometric corner elements. Mixing styles creates visual dissonance.
Stage two: surface preparation
Walls and ceilings must be level, clean, dry, and sturdy. Check flatness with a 2-meter straightedge — gaps exceeding 3 millimeters must be leveled with filler. An uneven surface will prevent tight adhesion of elements, leading to gaps; elements may detach as the adhesive dries.
Clean the surface of dust and grease contamination. Dust reduces adhesive adhesion; grease completely blocks it. Use a vacuum and a damp cloth. If walls are painted with glossy paint, sand the areas under the moldings with fine-grit sandpaper to create micro-texture.
Prime the surface with a deep-penetration primer. Primer strengthens the base, reduces absorbency, and improves adhesive adhesion. For drywall, priming is mandatory — without it, the adhesive will soak into the cardboard, failing to create a strong bond. Allow the primer to dry according to the manufacturer's instructions.
Third stage: marking
Precise marking is the foundation of neat installation. For ceiling cornices, mark a horizontal line on the walls at the desired distance from the ceiling. Use a laser level — it projects a perfectly horizontal line around the room in minutes. Without a laser level, use a water level — transfer marks to all corners and connect them with a line using a chalk line.
For molding frames on walls, marking is more complex. Determine the height of the lower frame boundary — typically 20-30 centimeters from the floor. Draw a horizontal line. Determine the height of the upper boundary — 20-30 centimeters from the ceiling or cornice. Draw a second horizontal line.
Divide the wall into vertical sections. For a wall 4 meters wide, 3-4 frames are optimal. Calculate the frame width so that distances between them and from the wall edges are equal. Mark vertical lines using a plumb line or laser level in vertical mode.
Mark the position of corner elements at line intersections. Place the element against the wall, trace with a pencil — this mark serves as a guide for applying adhesive and positioning the element.
Stage four: installation of corner elements
Begin installing the composition precisely with corner elements — they set the geometry; other details are fitted to them. Forcorner elements for ceilingschoose adhesive considering the element material and base.
For lightweight polyurethane elements on a solid base (plaster, concrete, drywall), polymer adhesives like 'liquid nails' are optimal. They set in 10-20 minutes and fully cure in 24 hours. Apply adhesive to the back of the element in intermittent lines or dots — a continuous layer is unnecessary; excess adhesive will squeeze out when pressed.
For heavy wooden elements or installation on a loose base, use two-component polyurethane-based or epoxy adhesives. They create a stronger bond and compensate for base irregularities. Setting time is longer — 30-60 minutes, allowing for element position adjustment.
Place the element at the installation site according to the marking, press firmly. Hold for 30-60 seconds until the adhesive sets. Check position with a level — the element must be strictly horizontal or vertical depending on the composition. Immediately remove excess adhesive that oozes out with a damp sponge.
For particularly heavy wooden elements, additionally use mechanical fastening. Drill a through hole 2-3 millimeters in diameter in an inconspicuous location — typically in a relief recess. Drive a finish screw so the head is fully countersunk. After the adhesive cures, the screw can be removed and the hole filled, or leave the screw and conceal the head with filler.
Step five: installation of straight molding sections
After installing all corner elements, mount the straight sections of molding. Measure the distance between two corner elements. Cut the molding 1-2 millimeters shorter — a small gap will compensate for inaccuracies and prevent the molding from protruding during shrinkage. The gap will be hidden with putty.
Cut the ends of the molding that join with the corner element strictly perpendicularly, without bevels. Use a miter box or miter saw. The cut should be even, without chips. For polyurethane, use a saw with fine teeth; for wood, use one with coarse teeth.
Apply glue to the back of the molding, press it against the wall, align the ends with the corner elements. Press the molding along its entire length. For long sections, work with an assistant — one person holds one end, the second adjusts the position along the entire length.
Check the tightness of the joints between the molding and the corner elements. If there is a small gap (up to 1-2 millimeters), this is normal — it will be covered with putty. A gap of more than 3 millimeters indicates an inaccurate cut — trim the end of the molding again.
Step six: finishing
After the glue has hardened (24-48 hours), proceed with finishing. Inspect all joints — between moldings and corner elements, between moldings when extending, and where they meet walls and ceilings. Fill small cracks and gaps with white acrylic sealant.
Apply sealant from a tube with a thin nozzle or a caulking gun. Guide the nozzle along the gap, filling it. Remove excess with a damp rubber spatula or a gloved finger. Smooth the sealant to create a seamless transition. Work in small sections — acrylic sealant sets in 5-10 minutes, after which it cannot be smoothed.
Fill large defects — chips, dents — with wood putty for wooden elements or universal acrylic putty for polyurethane ones. After drying, sand the putty flush with the surface using fine sandpaper.
If the elements are installed for painting, prime them with acrylic primer. The primer ensures uniform absorption and reveals defects that can be corrected with additional puttying. After the primer dries, apply paint in 2-3 coats with light intermediate sanding. Use high-quality water-based paint for interior work. Apply with a roller, and use a brush to work the relief.
To create an aged effect, apply patination. After the base paint (usually white or light) dries, apply dark patina — gold, silver, dark brown — into the recesses of the relief. Wipe off excess with a cloth, leaving patina only in the recesses. The result is a three-dimensional relief with accentuated details, giving the effect of noble, long-term aging.
Typical mistakes and how to avoid them
Error one: size mismatch
A corner element significantly smaller or larger than the molding looks out of place. A difference of 10-20 percent is acceptable, but an element twice as large as the molding overwhelms it, turning it into a frame around itself. An element half the size gets lost and fails to serve its decorative function.
Solution: choose a corner element that matches the molding in size. Manufacturers usually indicate element compatibility. If in doubt, request samples, place the molding and corner element together, and assess the harmony of the combination.
Error two: stylistic dissonance
A classic molding with a simple geometric profile and a baroque corner element with lavish carving do not go together. Similarly, a modern minimalist molding and a corner element with floral ornamentation do not match.
Solution: maintain stylistic unity. For classic profiles, choose classic corner elements. For modern ones, opt for simple geometric designs or no decoration at all. Consult a designer, study examples of finished interiors.
Error three: inaccurate marking
Crooked lines, asymmetrical frames, corner elements at different heights ruin the composition. Even levels off by a millimeter are noticeable.
Solution: use professional tools — a laser level, a long ruler, a tape measure. Double-check the markings before starting installation. Work slowly, recheck every mark.
Error four: weak fastening
A heavy wooden corner element glued only with adhesive without mechanical fastening may fall off after a few months or years. Especially on the ceiling, where gravity works to pull it away.
Solution: for elements weighing more than 200-300 grams, additional mechanical fastening is essential — screws, bolts, hidden anchors. Use high-quality adhesive and allow it to fully harden before applying load.
Error five: ignoring acclimatization
Wooden elements installed immediately after delivery from cold temperatures will deform when heated. The wood's moisture content equalizes with the room's humidity, causing shrinkage or swelling; the elements warp and detach.
Solution: let wooden elements acclimate in the installation room for at least 48 hours before mounting. Unpack them, lay them horizontally, and allow them to stabilize. Only then proceed with installation.
Answers to common questions
Can polyurethane corner elements be painted to look like wood?
Yes, modern paints with wood texture effects can mimic wood on polyurethane. The result is convincing from a distance of 2-3 meters. Upon close inspection and touch, the imitation is noticeable. For rooms with high ceilings where elements are out of reach, imitation is quite appropriate.
How to choose a corner element if the molding is non-standard?
If the molding has a unique profile, a standard corner element will not fit. Options: order a custom-made corner element from the manufacturer based on an individual project — expensive but guarantees a perfect match; use a universal corner overlay that attaches over the joint — simpler and cheaper; carefully miter the moldings themselves at 45 degrees — requires skill.
How much do corner elements cost?
Simple polyurethane corner elements without ornamentation — from 200 to 500 rubles per piece. Ornamented ones — 500-1500 rubles. Wooden corner elements made of beech — 1000-3000 rubles, made of oak — 1500-5000 rubles. Exclusive elements with hand carving — 5000-15000 rubles.
Can interior corner elements be used on the facade?
If the element is made of moisture-resistant material (polyurethane, wood with protective treatment), it is technically possible. But facade conditions are harsher — temperature fluctuations, precipitation, ultraviolet radiation. UseFacade Corner Elementsspecifically designed for exterior use. They have a reinforced structure and additional protective treatment.
How to care for installed corner elements?
Wipe painted elements with a dry or slightly damp soft cloth to remove dust. Do not use abrasives or aggressive cleaning agents. For elements with a clear coating, refresh every 3-5 years — remove the old layer with light sanding and apply fresh varnish or oil. Patinated elements can be further accentuated with patina in the recesses.
Is it mandatory to use corner elements or can one manage with mitering moldings?
You can manage with mitering if you have the skill, precise tools, and patience. Professional finishers often miter moldings — it's faster if you have experience. For a non-professional, corner elements guarantee a quality result, saving time, nerves, and material. A molding ruined by inaccurate mitering costs more than a corner element.
Conclusion: create flawless interiors with STAVROS
Corner decorative elements— a subtle but critically important detail of interior decor. Professionally installed corner elements transform molding joints into exquisite accents, emphasize the room's architecture, and create a sense of completeness and thoughtfulness in every detail.
Company STAVROS offers the widest range of corner elements made of natural wood and polyurethane for any interior style and decorative task. The catalog features hundreds of models — from simple functional elements for minimalist spaces to luxurious ornamented details for classic interiors.
Wooden Corner ElementsWooden corner elements by STAVROS are made from selected solid oak and beech, kiln-dried to a moisture content of 10-12 percent. Milling is performed on the latest generation CNC machines, reproducing the most complex ornaments with an accuracy of up to tenths of a millimeter. Finishing includes multi-stage sanding, priming, and coating with oil or varnish as per the customer's choice.
Polyurethane corner elementsby STAVROS are made from dense polyurethane using injection molding. The material density of 550-650 kilograms per cubic meter ensures rigidity and strength with low weight. All elements are supplied with factory-applied white primer, ready for painting with any paints.
The assortment includesMolding corner piecesfor all main profiles of the STAVROS catalog, guaranteeing perfect compatibility. Each element has mounting points that precisely replicate the cross-section of the corresponding molding. This ensures a tight joint without gaps and simplifies installation.
For facade decor, STAVROS offers specializedFacade Corner Elementswith a reinforced structure. They are made from moisture-resistant wood species (larch, oak) or dense facade polyurethane with UV stabilizers. Protective treatment includes deep antiseptic impregnation and multi-layer coating with facade varnishes or paints.
The custom manufacturing service is available for projects requiring unique elements. STAVROS technologists will develop a corner element for a non-standard molding, create an exclusive ornament based on a designer's sketch, or adapt a historical sample from archival drawings. Production is carried out on high-precision equipment with the possibility of manual finishing by master carvers.
STAVROS delivery geography covers all of Russia and CIS countries. Its own stock program in Moscow and St. Petersburg ensures the availability of popular items and fast shipment. Established logistics guarantee delivery to any region while preserving the product's appearance. Packaging is done considering the fragility of the elements — individual wrapping, rigid inserts, cushioning materials.
STAVROS technical support includes free consultations on element selection, calculation of required material quantities, and recommendations for installation and finishing. Experienced specialists will help avoid mistakes and suggest optimal solutions for a specific project.
Choosing STAVROS means choosing quality, confirmed by 23 years of experience in the decorative elements market. Thousands of completed projects — from private apartments to palace interiors — testify to the reliability of the products and the professionalism of the team. Create interiors where every corner is a work of art, with corner decorative elements from STAVROS.


