Article Contents:
- Philosophy of combining: why two materials are better than one
- Scenarios for different rooms
- Living room: grandeur and coziness
- Office: Solidity and Focus
- Bedroom: tranquility and softness
- Solid wood base: wainscoting and panels
- Construction of classic wainscoting
- Materials for panels
- Panel division schemes
- Rail as rhythm and acoustics
- Visual rhythm: psychology of perception
- Acoustic function: physics of sound
- Combining rails with panels
- Polyurethane accents: outlets, moldings, corners
- Ceiling outlets: focal points
- Wall moldings: space graphics
- Corner elements: technology without compromise
- Color and texture pairs: oak/maple + enamel
- Monochromatic scheme: unity through color
- Contrast scheme: natural wood + white polyurethane
- Tonal scheme: gradations of one color
- Patina and gilding: classic luxury
- Joints with doors and baseboards
- Door opening in panel wall
- Panel junction with baseboard
- Rail wall and baseboard
- Quick assembly and finishing after painting
- Sequence of work
- Assembly timelines
- Finishing after painting
- Wall layout examples with dimensions
- Example 1: Living room 4×3 meters, one accent wall
- Example 2: Office 3.5×4 meters, full boiserie along perimeter
- Example 3: Bedroom 4×4.5 meters, accent lath wall
- FAQ: answers to common questions
- Conclusion: The art of synergy

Modern interior is not a choice between tradition and innovation, but their virtuoso combination.Interior compositionFrom wooden boiserie, laths, and polyurethane moldings — this is a symphony of materials, where each plays its part, creating harmony in space. Wood provides tactility, warmth, status. Polyurethane ensures complex forms, moisture resistance, economic efficiency. Together, they create interiors impossible to achieve using only one material. Let’s explore the technologies of combining, application scenarios, practical mounting details — how to create a composition where each element is in its place.


Philosophy of combining: why two materials are better than one
Traditional approach — use one material for all decorative elements in the interior. Wood everywhere or polyurethane everywhere. The logic is clear — unity of material creates a unified perception. But the modern approach is more flexible and pragmatic.
Functional zoning — first principle of combining. Wood where tactile quality, strength, and repeatability are important — in lower wall zones (boiserie panels 80–120 cm high from floor), on furniture elements, as lath structures that are touched. Polyurethane where complex forms, moisture resistance, and easy installation are important — in upper zones (ceiling cornices, friezes), in humid areas, for creating ornamental compositions.
Economic rationality — second principle. Premium wood (oak, beech) is used for visible, accent elements that create material value in the interior. Polyurethane — for secondary, repeating elements, where material is not critical, but form matters. Such a combination allows achieving visual richness of classic interiors while reducing budget by 40–60% compared to fully wooden solutions.
Technological optimality — third principle. Some tasks wood solves better (lath structures with precise geometry, panels with deep milling, elements requiring strength). Others — polyurethane (curved forms, arched openings, complex ornaments, elements for humid zones). Combining materials, we use the strengths of each.


Scenarios for different rooms
Our factory also produces:


Living room: grandeur and coziness
Living room — the heart of the home, place for guests and family evenings. Here, the interior composition must be simultaneously grand and cozy, impressive and comfortable.
Classic scheme:Interior wall panelsfrom wood in lower wall section (height 100–120 cm), forming traditional boiserie. Panels made of solid oak or MDF veneered with oak, divided into rectangular fields 80×100 cm each by decorative layouts. Panel surface — natural wood under matte lacquer or stained (bleaching + lacquer), emphasizing wood texture.
Middle wall zone (from 120 cm to 240 cm from floor) — painted in neutral color (light gray, beige, dusty blue) or covered with textured wallpaper. On this zone, a composition ofof polyurethane moldings— vertical and horizontal strips 40–60 mm wide form frames, within which another shade of paint or decorative insert may be placed.
Upper zone (frieze, from 240 cm to ceiling) and ceiling cornice —molded decoration made of polyurethane— wide cornice 100–120 mm high with classic profile (coves, rolls, ornaments), painted white, crowns the composition.
Dimensions for 4×3 meter wall:
-
Wooden panels for lower zone: height 110 cm, 4 vertical fields 90 cm wide each = 4 panels 90×110 cm
-
Wooden layouts for framing panels: (4×4 + 5×1.1) × 2 = about 43 linear meters (layout width 40 mm)
-
Polyurethane moldings for middle zone: 3 vertical frames 100 cm high, 80 cm wide = (1+0.8)×2×3 = about 11 linear meters of molding 50 mm wide
-
Polyurethane ceiling cornice: 4 meters + corners
Accent wall:wall-mounted interior railsbehind TV or sofa — vertical oak laths 40×40 mm cross-section, spaced 40 mm apart, from floor to ceiling, on a 2.5–3 meter wide section. Laths are mounted on a lath framework, behind which wiring can be concealed and LED lighting installed. Lath surface — oil or matte lacquer, emphasizing oak texture.
Get Consultation
Office: solidity and concentration
The office requires an atmosphere of focus, respectability, and tradition. Wood dominates here, while polyurethane plays a supporting role.
Full boiserie: all walls from floor to ceiling are clad in wooden panels. Lower zone (80 cm) - solid oak panels with simple profiles or smooth. Middle zone (up to 220 cm) - vertical panels 60-70 cm wide and 140 cm high, framed with decorative moldings. Upper zone (frieze) - horizontal band 50 cm wide, finished with a wooden cornice.
But creating a fully wooden cornice of complex shape is expensive and labor-intensive. Here, polyurethane comes to the rescue — a ceiling cornice 80-100 mm wide, made of polyurethane, painted to match wood (oak stain, then matte varnish), visually indistinguishable from wooden, but costs 3-4 times less and is installed much faster.
Bookshelves and cabinets: built-in or carcass-style made of solid oak. The upper part of cabinets is topped with a wooden cornice, but if ceiling height is significant (3+ meters) and the cornice is high up, a polyurethane cornice in wood finish can be used — saving money without visual loss.
Dimensions for the office 3.5×4 meters:
-
Wooden panels: perimeter (3.5+4)×2 = 15 meters, height 2.5 m (to the ceiling cornice), panel area approximately 37 sq.m
-
Wooden battens for panel division: depends on the scheme, approximately 80-120 linear meters for an average division scheme
-
Polyurethane ceiling cornice in wood finish: 15 meters + 4 corners
Bedroom: calmness and softness
Bedroom — a place for rest and relaxation. Here, soft shapes, natural materials, and tactile qualities are important.
Accent headboard wall:Interior panelMade of wooden battens behind the bed — vertical battens of beech 30×40 mm, from floor to ceiling, zone width 2-2.5 meters (slightly wider than the bed). Batten spacing 30-40 mm, surface — toning in calm gray or warm beige + matte varnish. Behind the battens — acoustic felt (sound absorption for quiet) and LED lighting (soft light for reading).
Other walls: smooth, painted in a calm color (dusty rose, gray-blue, light beige). Around the perimeter of walls at 180-200 cm height — horizontal polyurethane molding 30-40 mm wide, creating a visual boundary between wall and ceiling, reducing the perception of ceiling height (relevant for high ceilings 3+ meters).
Ceiling: simple white polyurethane ceiling molding 50-70 mm wide, minimalist profile (semi-circular or with one fillet), white color — creates a clear boundary but does not overload the space.
Dimensions for the bedroom 4×4.5 meters:
-
Wooden battens on accent wall: width 2.5 meters, height 2.7 m, batten spacing 70 mm (30 mm batten + 40 mm gap), number of battens around 35, length of each 2.7 m = approximately 95 linear meters
-
Batten framework: 2.5 meters × 4 horizontal beams = 10 linear meters of 40×40 mm beams
-
Polyurethane horizontal molding on other walls: (4+4.5+4)×2 - 2.5 (accent wall) = approximately 22 linear meters
-
Ceiling molding: (4+4.5)×2 = 17 meters
Solid wood base: bouillons and panels
Wooden panel systems — the foundation of interior composition. They create material value, tactile quality, and longevity.
Construction of classic bouillons
Bouillons consist of several layers: frame (a framework of 40×40 or 50×50 mm beams, mounted on the wall), base (panels of plywood, MDF, or solid wood, mounted on the frame), decorative layer (battens, moldings, panels, forming the visible surface).
The frame is mounted on the wall with vertical and planar alignment. Even if the wall is uneven (10-15 mm deviations), the frame is perfectly leveled using shims. Panels — sheets of plywood or MDF 10-18 mm thick, cut to field sizes — are attached to the frame with finish nails or glued, forming the decorative border.
Materials for panels
Solid oak or beech — premium solution. Panels 15-20 mm thick from solid-core boards (glued laminates) or solid wood (for small panels up to 40×60 cm). Surface can be smooth or routed (relief fillet). Finish — oil, wax, or matte varnish.
Advantages: naturalness, tactile quality, longevity (50+ years), possibility of multiple restorations, prestige. Disadvantages: high cost (oak panels — from 3000-5000 rubles/sq.m), weight (requires strong frame and secure mounting), sensitivity to humidity (requires climate control).
MDF with veneer — optimal cost-to-quality solution. Base of MDF 10-16 mm thick, veneered with oak, beech, or walnut veneer 0.6-1.5 mm thick. Visually indistinguishable from solid wood (natural wood texture visible), but geometrically more stable and 40-60% cheaper.
Advantages: stability (MDF does not "move" with humidity), affordable price, smooth surface without defects. Disadvantages: limited repairability (thin veneer, deep scratches are hard to restore).
MDF for painting — economical solution. Panels of MDF without veneer, primed, ready for painting. Surface is perfectly smooth.
Advantages: minimal cost, possibility of painting in any color, ease of installation. Disadvantages: absence of wood texture (purely functional solution).
Panel division schemes
Symmetrical regular - a classic approach. The wall is divided into identical rectangular fields arranged rhythmically. For example, a 4-meter wall is divided into 4 fields, each 90 cm wide (40 cm remains for side coverings). The height of the fields is usually greater than the width in a ratio of 1:1.2–1:1.5 (vertical format).
Asymmetric compositional - a modern approach. The central field is large (e.g., 120×150 cm), the side fields are smaller (60×100 cm). It creates a visual accent at the center and compositional dynamism.
Three-part - a traditional French scheme. Lower panel 80–100 cm high, middle zone with vertical panels 120–140 cm high, upper frieze 40–60 cm high. Each zone is framed by a horizontal covering or molding.
Ridge as rhythm and acoustics
wall-mounted interior railsThis is not just decoration, but a functional element controlling the visual rhythm and acoustics of the space.
Visual rhythm: psychology of perception
Ridge wall creates a rhythmic structure - alternating light and shadow, mass and void. This rhythm affects the perception of space and emotional state.
Frequent rhythm (narrow ridges 20–30 mm with 20–30 mm gaps) creates activity, dynamism, visual density. Suitable for active zones - living rooms, kitchens, public spaces. Visually, such a wall appears almost solid, with thin shadow lines.
Medium rhythm (ridges 40 mm with 40–60 mm gaps) - balance, classic variant. Creates structure without overload. Suitable for most interiors.
Sparse rhythm (ridges 40–50 mm with 80–120 mm gaps) creates lightness, airiness, transparency. Suitable for bedrooms, relaxation zones, small rooms (does not overload space).
Acoustic function: physics of sound
Ridge construction with acoustic material behind the ridges (wool, mineral wool with density 60–80 kg/m³, special acoustic panels) acts as a sound absorber. Sound waves penetrate through gaps between ridges, hit the soft acoustic material, which absorbs their energy.
The sound absorption coefficient of such a construction is 0.5–0.8 for mid and high frequencies (500–4000 Hz), meaning 50–80% of sound energy is absorbed. For residential spaces, this is a significant improvement in acoustics - reduced reverberation (echo), improved speech intelligibility, overall acoustic comfort.
Combination of ridges with panels
Effective approach - combining smooth buazery panels in the lower part of the wall with ridge construction in the upper part. For example, up to 100 cm - wooden panels from oak, smooth or with simple profiling, painted in dark color (graphite, chocolate). Above, up to the ceiling - vertical ridges of the same oak, but in natural color under oil, with 50 mm spacing.
Contrast of dark lower and light upper sections, smooth and textured, creates visual depth and interesting texture play. Functionally, the lower zone is protected by durable panels, while the upper zone ensures acoustic comfort.
Polyurethane accents: outlets, moldings, corners
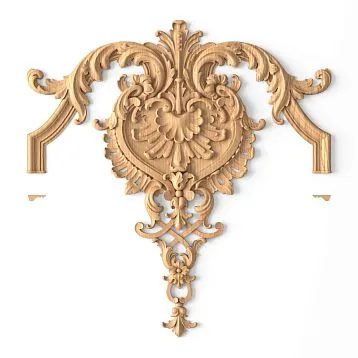
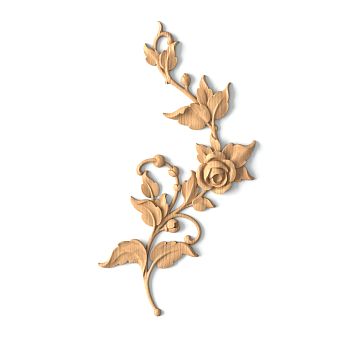
decorative polyurethane elementsThey complement the wooden base, adding ornamental complexity, architectural details, and compositional completeness.
Ceiling outlets: focal points
Ceiling outlet - a round or polygonal decorative element mounted on the ceiling at the point of chandelier attachment. Outlet diameter ranges from 30 cm (for compact chandeliers) to 100+ cm (for large formal rooms).
Polyurethane cast outlets with rich relief - acanthus leaves, rosettes, geometric ornaments. After painting white (or antiquing) such an outlet becomes a central ceiling accent.
In combination with wooden buazery, a polyurethane outlet creates a vertical axis of symmetry. If the lower part of the walls is wooden and the upper part is painted, the ceiling outlet connects these zones, creating visual unity.
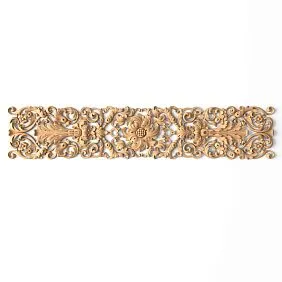
Wall moldings: space graphics
Polyurethane moldings on painted wall sections create frames, divisions, rhythm. Typical width of wall moldings is 40–80 mm; profile can be simple (flat, semi-circular) or complex (with coves, rolls, ornaments).
In combination with wooden panels, polyurethane moldings are used in the middle and upper wall zones, where they are not reachable, material is not critical, shape and ease of installation are important.
Corner elements: technology without compromises
Ready-made polyurethane corner elements (internal and external angles for moldings, corner blocks with ornaments) radically simplify installation. Instead of precise 45-degree trimming and pattern matching (which is practically impossible by hand for complex ornaments), simply glue in the ready-made angle.
In compositions where the base is wooden and the decorative upper frieze is polyurethane, ready-made angles ensure perfect joints without labor-intensive fitting.
Color and texture pairs: oak/maple + enamel
Color solution determines the character of the interior no less than the shape of elements.
Monochromatic scheme: unity through color
Advantages: visual lightness, space expansion (white reflects light), universality (suitable for most styles). Disadvantages: loss of wood texture (if important), susceptibility of white surfaces in lower zones.
Advantages: visual lightness, space expansion (white reflects light), versatility (suitable for most styles). Disadvantages: loss of wood texture (if important), susceptibility of white surfaces in lower zones to stains.
Contrast scheme: natural wood + white polyurethane
Wooden elements (panels, rails) remain in their natural color - oak under oil or matte lacquer (golden-brown), beech under oil (light pink). Polyurethane elements (moldings, cornices, rosettes) are painted white.
The contrast of warm wood and cool white creates visual dynamics, highlighting wood texture. White polyurethane against colored walls creates clear graphic lines.
Tonal scheme: gradations of one color
Wooden panels are tinted in a dark shade (stained oak, wenge), polyurethane elements are painted in a medium or light shade of the same color spectrum (gray, light brown). This creates a vertical gradient - dark lower part, light upper part, visually raising the ceiling.
Patina and gilding: classic luxury
For classic interiors - patina technique. Wooden panels are painted in a light base color (ivory, pearl), then a dark patina (brown, green) is applied, which partially wears off, remaining in the recesses of the relief.
Polyurethane moldings are patinated similarly. To enhance the effect, gold paint is applied to raised parts of the relief - imitating gilding. After such treatment, the difference between wood and polyurethane is practically indistinguishable, perceived as a single luxurious surface.
Joints with doors and baseboards
The quality of the composition is determined by the quality of details, especially joints between different elements.
Door opening in a panel wall
When a door is located in a wall with boiserie, it is necessary to properly join the panels with the door frame and casing.
Variant 1: Panels extend to the edge of the door opening, the panel end is covered with wooden trim, which is adjacent to the door casing. Visually - a clear boundary between the panel zone and the opening.
Variant 2: Panels wrap around the opening, creating a trim frame that repeats the door's contour. Inside the frame - a deeper trim or molding, creating a "portal" around the door. More complex, but elegant.
Variant 3: Panels do not reach the door by 10-15 cm, this gap is painted in the wall color, creating a visual break. Simplifies installation, but less visually cohesive.
Joining panels with baseboards
Boiserie wooden panels end at 80-120 cm from the floor. Below - a regular wall (painted or wallpapered) and baseboard. How to join?
Horizontal trim at the boundary of panels and wall - classic solution. Trim 50-80 mm wide, decorative or simple profile, runs around the entire perimeter of the room at the height of panel termination. Creates a clear boundary, architectural line, dividing the wall horizontally.
Baseboard should match panels in style and color. If panels are natural oak, baseboard is also natural oak. If panels are painted white, baseboard is white. Baseboard height is usually less than panel trim width (baseboard 80 mm, trim 50 mm) for visual harmony.
Lath wall and baseboard
When vertical laths reach the floor, the question arises - how to join them with the baseboard?
Variant 1: Laths stop at baseboard height (8-12 cm from floor), not reaching the floor. Baseboard runs under laths. Visually - laths appear to float above the floor. Installation is simple.
Variant 2: Laths reach the floor, baseboard is interrupted at the lath structure. Visually - laths are integrated into the floor, creating continuity from floor to ceiling. Installation is more complex - laths must be precisely fitted to the floor, gaps sealed.
Variant 3: Special baseboard with relief matching the rhythm of laths (recesses under laths). Such baseboard is custom-made. Visually - perfect integration, but expensive.
Quick installation and finishing after painting
Speed and quality of installation determine the project's economy and satisfaction with the result.
Work sequence
Stage 1: Wall preparation. Leveling (plastering, spackling), priming. For wooden panels, perfect flatness is not critical (frame compensates), but for polyurethane moldings glued directly to the wall, flatness is important.
Stage 2: Installing the frame for panels. Use 40×40 or 50×50 mm strips, secured to the wall with dowels or anchors. Align vertically and horizontally. Vertical posts spaced 60 cm apart, horizontal crossbars 80–100 cm apart.
Stage 3: Installing base panels. Cut plywood or MDF sheets to size and attach them to the frame with self-tapping screws. Leave 3–5 mm gaps between panels (to compensate for thermal expansion).
Stage 4: Installing wainscoting. Attach wooden wainscoting to panels using construction adhesive and additionally secure with finish nails without heads (using an air nail gun). Mitre joints at corners at 45 degrees.
Stage 5: Installing polyurethane elements. Mouldings, cornices, and rosettes are glued using special polyurethane adhesive. Setting time: 30–60 seconds, full drying: 24 hours.
Stage 6: Spackling. Fill all joints, fastener locations, and gaps with acrylic spackle, then sand after drying.
Stage 7: Painting/varnishing. Wooden elements: varnish, oil, or enamel in 2–3 coats. Polyurethane elements: acrylic paint in 2–3 coats. Light sanding between coats.
Installation Timeline
For a 4×4 meter room with boiserie on three walls (fourth wall is a window) and lath construction on one wall:
-
Wall preparation - 2–3 days
-
Installing frames - 1 day
-
Installing panels and wainscoting - 2–3 days
-
Installing laths - 1–2 days
-
Installing polyurethane elements - 1 day
-
Spackling and sanding - 1–2 days
-
Painting (with drying time between coats) - 3–4 days
Total: 11–16 working days for a two-person crew.
Post-painting refinements
After painting and full drying, a final inspection is conducted. Possible defects: uneven paint coverage in relief grooves, paint drips, missed joints, minor scratches.
Refinements: touch-up painting with a fine brush, light sanding of drips with fine abrasive (400–600 grit), followed by touch-up, filling missed joints with thin color-matched sealant.
Examples of wainscoting layout by wall with dimensions
Example 1: Living room 4×3 meters, one accent wall
Wall 1 (accent, 4 meters):
-
Lower zone: oak wooden panels, height 110 cm, divided into 4 fields by 40 mm wide wainscoting
-
Fields: 4 rectangles, each 90×110 cm
-
Middle zone: painted gray, features 3 frames made of 50 mm wide polyurethane molding, each frame 80×100 cm, spaced 50 cm apart
-
Upper zone: frieze 50 cm high, painted white
-
Ceiling cornice: polyurethane, 100 mm high, white
Materials for Wall 1:
-
Oak panels: 4.4 sq.m (4 m × 1.1 m)
-
Oak 40 mm wainscoting: (4 m × 2 + 5 pcs × 1.1 m) × 2 ≈ 27 linear meters
-
50 mm polyurethane molding: 3 frames × (0.8+1.0) m × 2 = about 11 linear meters
-
100 mm polyurethane cornice: 4 m + 2 corners
Example 2: Office 3.5×4 meters, full boiserie around the perimeter
Perimeter: (3.5+4)×2 = 15 meters
Lower zone (height 80 cm):
-
Oak wood panels, smooth, divided by vertical grooves 30 mm wide into fields 60 cm wide
-
Number of fields around the perimeter: 15 m / 0.6 m = 25 fields
Middle zone (from 80 cm to 220 cm, height 140 cm):
-
Oak wood panels, louvered, divided by grooves into vertical fields 70 cm wide, 140 cm high
-
Number of fields: 15 m / 0.7 m = about 21 fields
Upper zone (frieze, from 220 cm to 270 cm, height 50 cm):
-
Smooth wooden panels
Ceiling cornice:
-
Polyurethane under oak tinting, height 80 mm, length 15 m + 4 corners
Materials:
-
Oak panels: (15 m × 0.8 m) + (15 m × 1.4 m) + (15 m × 0.5 m) = 40.5 sq.m
-
Oak 30 mm grooves for lower zone: about 50 linear meters
-
Oak 50 mm grooves for middle zone: about 80 linear meters
-
80 mm polyurethane cornice: 15 m + corners
Example 3: Bedroom 4×4.5 meters, accent louvered wall
Headboard wall (4.5 meters):
-
Vertical beech slats 30×40 mm, from floor to ceiling (height 2.7 m), spacing 70 mm (30 mm slat + 40 mm gap)
-
Number of slats: 4.5 m / 0.07 m = about 64 slats
-
Behind the slats: 9 mm acoustic felt + LED strip
Other walls:
-
Smooth painted (color dusty rose)
-
At 200 cm height — horizontal polyurethane molding 40 mm wide around the perimeter of three walls
Ceiling:
-
Simple white polyurethane ceiling molding 60 mm
Materials:
-
Beech 30×40 mm slats: 64 pcs × 2.7 m = about 173 linear meters
-
Lattice for slats (40×40 mm beams): 4.5 m × 4 horizontal = 18 linear meters
-
Acoustic felt: 4.5 m × 2.7 m = 12 sq.m
-
40 mm polyurethane molding: (4 + 4 + 4.5) × 2 - 4.5 = approximately 20.5 m
-
Ceiling skirting 60 mm: (4 + 4.5) × 2 = 17 m
FAQ: answers to frequently asked questions
Can oak panels be combined with polyurethane moldings?
Not only is it possible, but it is recommended for budget optimization without sacrificing visual quality. Oak panels create material value in the lower tactile zone, while polyurethane moldings in upper zones and on the ceiling, after painting, visually indistinguishable from wood, but 3-4 times cheaper and easier to install.
How to paint polyurethane to look like wood?
Use multi-layer painting technique: base layer of light paint (beige, light brown), then application of dark stain or paint with partial wiping (dry brush technique), then matte varnish. Special wood-effect paints can be used. After such treatment, polyurethane visually resembles stained wood, especially at heights of 2+ meters.
How much does an interior composition for a 4×4 meter living room cost?
Estimated calculation (one accent wall with boiserie + wainscoting, others with polyurethane moldings):
-
Oak panels: 5 sq.m × 4000 rub = 20000 rub
-
Oak flooring: 30 m × 400 rub = 12000 rub
-
Oak wainscoting: 100 m × 500 rub = 50000 rub
-
Polyurethane moldings: 40 m × 300 rub = 12000 rub
-
Crown molding, outlets: 10000 rub
-
Lathing, frame: 5000 rub
-
Painting, varnishing: 30000 rub
-
Installation: 50000 rub
Total turnkey cost: approximately 189000 rubles. From beech - 20% cheaper.
Can boiserie be installed in wet areas?
Wooden boiserie in the bathroom - even with moisture-resistant treatment, it is risky. Better to use MDF panels with waterproof coating or combination: in areas of direct water contact (around the bathtub, shower) - ceramic tiles, in other areas - wooden or MDF panels with quality waterproofing. Polyurethane moldings are completely moisture-resistant - ideal for bathrooms.
How to care for a combination composition of wood + polyurethane?
Wooden elements under lacquer: dry or slightly damp cleaning, periodically (every 2-3 years) wood polish. Under oil: same + oil renewal every 3-5 years. Polyurethane elements: wet cleaning with any soft cleaning agents, optionally with a small amount of detergent. Neither material requires special care; both last for decades.
Is it necessary to paint wooden panels if a natural look is planned?
Even for a natural look, protective coating is required - oil (2-3 layers) or matte varnish (2-3 layers). This protects wood from dirt, moisture, mechanical damage, enhances texture, and gives a slight gloss. Without coating, wood quickly darkens, stains, and loses its appearance.
Can elements of the composition be added after finishing the renovation?
Yes, this is one of the advantages of a modular approach. For example, wooden panels and base painting are done first. A year later, it is decided to add a wainscoting structure on one wall or polyurethane moldings in the middle zone. This is achievable without redoing the existing work - new elements are mounted over painted walls, joints are carefully filled and touched up.
What tools are needed for installation?
Basic set: circular saw with laser guide (precise trimming of flooring and moldings), drill (frame assembly), pneumatic nail gun for finishing nails (flooring installation), laser level (marking), tape measure, square, pencil. For painting: brushes (for corners and relief), rollers (for smooth surfaces), compressor with spray gun (for large areas, ideal even coating).
Conclusion: the art of synergy
Interior compositions combining wooden boiserie, wainscoting, and polyurethane decorative elements are not compromises, but a deliberate strategy leveraging the strengths of each material. Wood creates material value, tactile quality, durability, and connection to nature. Polyurethane provides architectural complexity, moisture resistance, fast installation, and economic efficiency. Together, they create interiors impossible to achieve with a single material — interiors where classic luxury blends with modern technology, where every ruble invested delivers maximum return, where beauty serves for decades.
Company STAVROS has been specializing in creating comprehensive interior solutions for over 15 years, combining premium solid oak and beech products with modern polyurethane decorative elements in their projects. STAVROS’s unique approach is not merely selling materials, but creating ready-to-install turnkey interior compositions, where each element is selected, calculated, manufactured, and installed by professionals.
STAVROS portfolio includes more than 200 completed projects of wainscoting, plank structures, and combined compositions for apartments, country houses, and public spaces. Our own production of wooden elements on high-precision CNC equipment allows us to manufacture panels, layouts, and planks of any size and profile according to individual drawings with accuracy up to 0.1 mm.
Partnership with leading European manufacturers of polyurethane decor (Orac, Decomaster, Europlast) provides access to thousands of molding, cornice, rose, and overlay models for any taste and budget. STAVROS design team creates 3D visualizations of future compositions, allowing you to see the result before work begins, make adjustments, and choose optimal solutions.
STAVROS professional installation crews (with master experience of 10+ years) perform installation with jewel-like precision — perfect joints, flawless geometry, and final finishing. Our own painting workshop provides finishing of any complexity — from simple varnishing to multi-layer patination and gilding.
Full cycle of work (from measurements and design to final cleaning) takes 3–5 weeks depending on project scale. Warranty on all work — 3 years, warranty on materials — 5–10 years (wood) and 15–25 years (polyurethane). Post-sale support includes advice on care, assistance in furniture and decor selection, and local repairs if needed.
Choosing STAVROS means investing not just in a beautiful interior, but in a space where every detail is thought out, every material operates in its zone of maximum efficiency, where classical beauty is enhanced by modern technologies. A space that will delight for decades, preserving its original freshness and elegance. Because true quality is not merely choosing the most expensive material, but the ability to properly combine different materials, creating synergy where the whole is greater than the sum of its parts.